Semester/Term 2 - Props 3
Miniature 1:2 Scale Apple


Miniature Model Apple
The miniature apple was supposed to be 1/3 size but experiments showed this to be too small so switched to a scale of 1:2 half size. This could be used when foreshortening or making characters appear larger than they were as well as miniature modelmaking.
This also introduced us to:
- Plastaline model forming.
- Silicon moulding.
- Resin casting.
- Airbrushing.
Research and Analysis
The first stage was to analyse apples:
- Size
- Shape
- Colour
- Texture


Sculpting
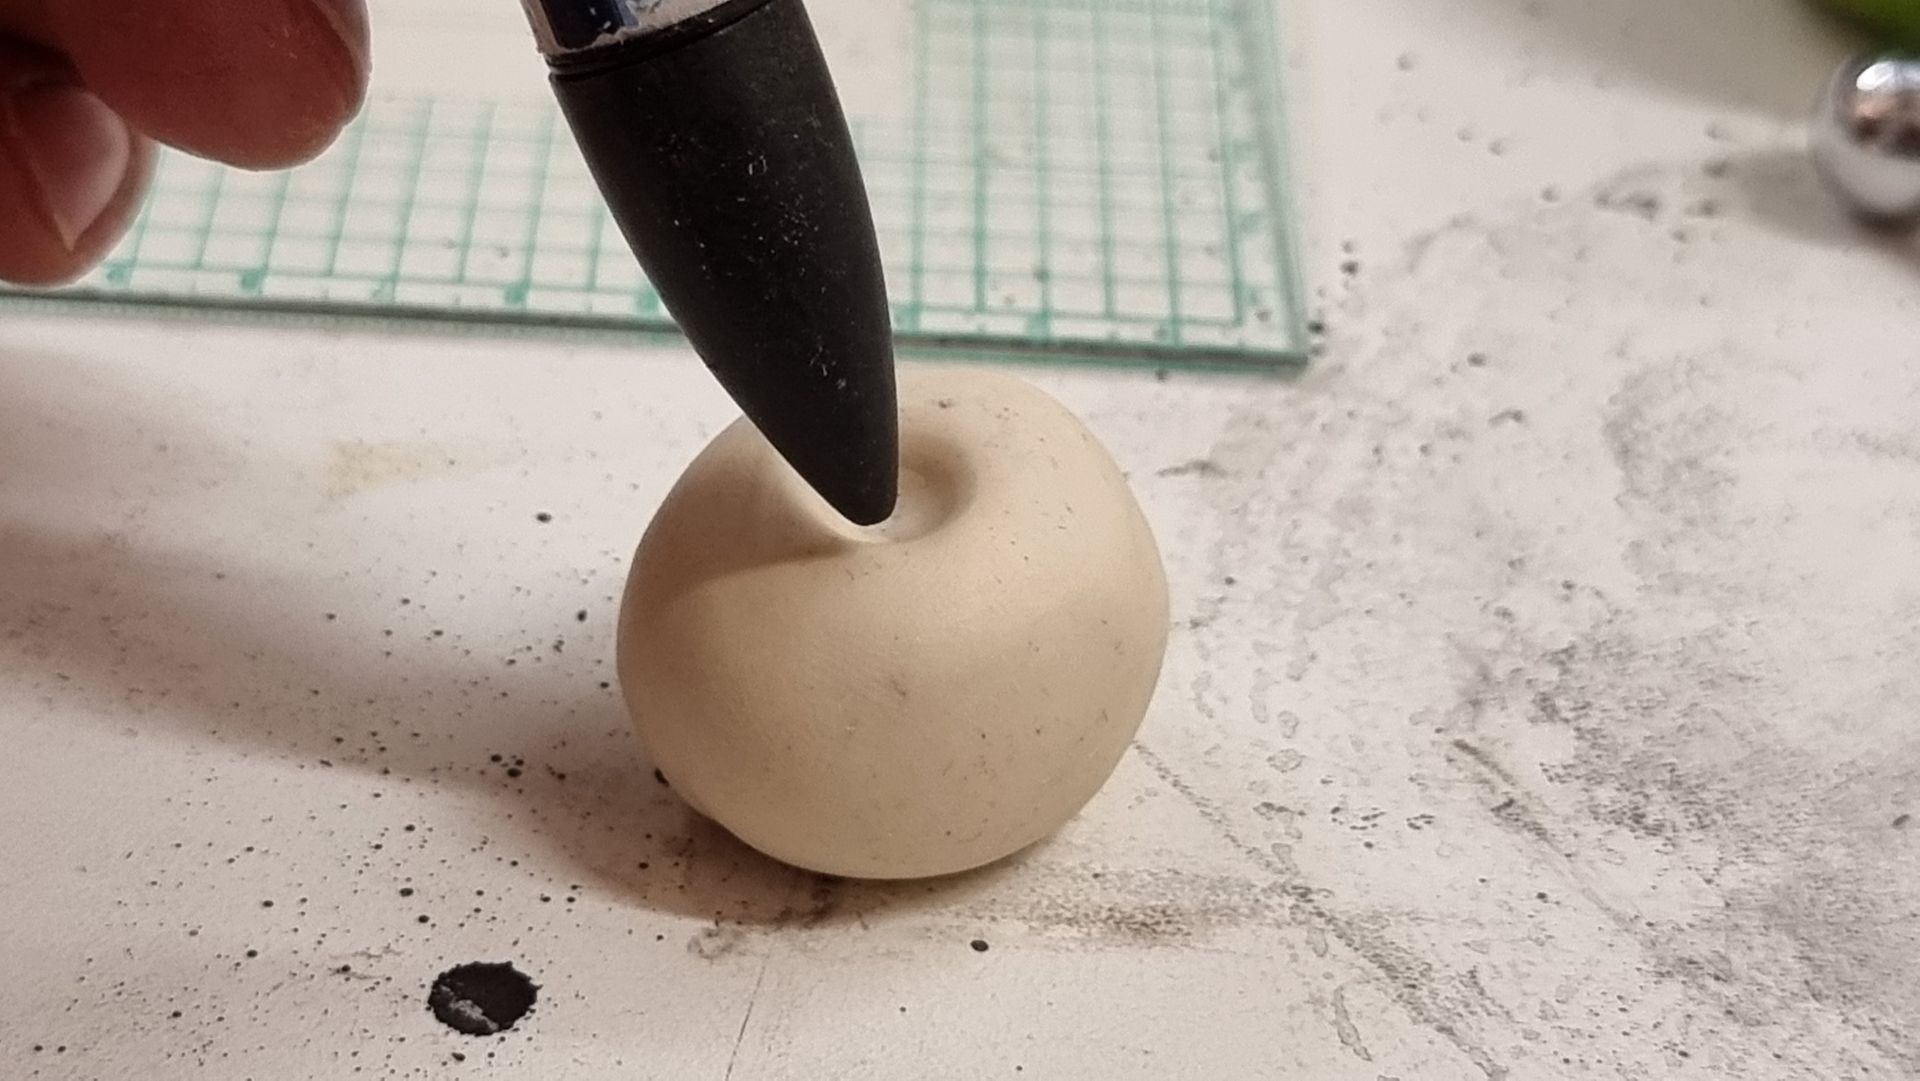
Plastaline a synthetic clay that softens with low heat is often used make sculpts that are likely to be moulded to cast:
- Props
- Set Decoration
- The Bodies of Stop Motion and Animatronic Characters
- Costumes such as Dinosaur Suits
- Tools
- Jewellery
- Prosthetics
- And More.
- After
These were formed with hands and then sculpting tools such as ball end tools for smoothening.
I found pens made useful sculpting tools for the intent on the apple.
Blunted blade tools helped to create the crease star on the top of the apple.
A ring was added to the underside to support the , and bond the apple sculpt to the mould that could be sanded off after casting.


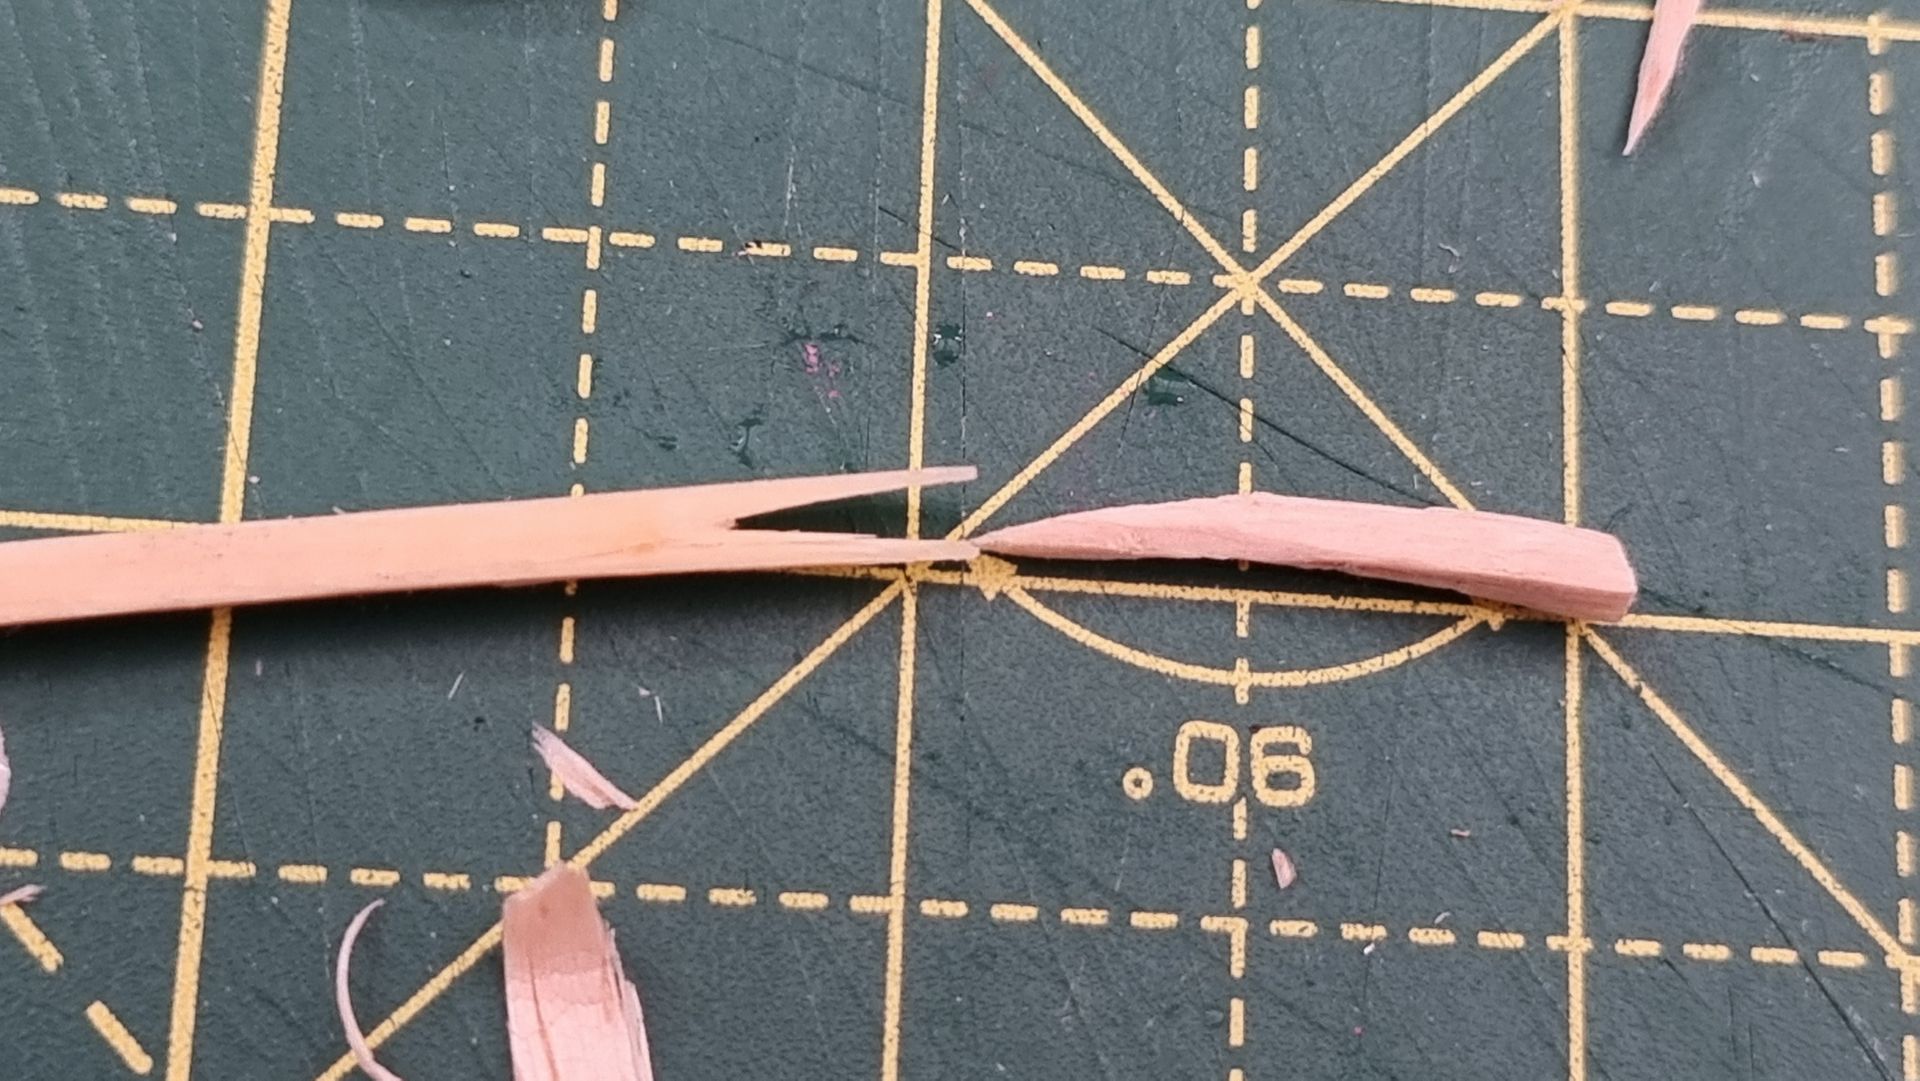
Storks, Leaves and Maggots
The apple stalks were carved from balsa wood with scalpels, sandpaper and files. Leaves were sculpted from Plastaline.
I wanted my apple to stand out and for fun I thought iot would be a neat idea to add maggots.
For this I just purchased a small bag of dried meal worms from a pet shop.
These were then placed in a cut plastic beaker, help with glue gun glue to start to form a mould for the silicon to make a silicon mould.


Making the Silicon Box Mould
To mould in a simple silicon box mould 1st the sculpts and items to be moulded were connected to a base such as foam board. When set the mould would be flipped over so the base becomes the top when pouring in resin.
Depending on the item to be moulded, if likely to create over hangs in the mould, which when flipped over could be where air could be trapped causing bubbles then air release channels would be added using foam board or Plastaline cones etc. The items could be placed on stalks if not flat bottomed, so the silicon could be formed around the sculpt.
A wall needed to be built around the items to be moulded with a minimum gap of 1cm around and above the items in the mould.
This wall could be made with Lego, but more commonly made with foam board or a cut mixing beaker. Whatever the case these were sealed with glue gun glue with no gaps for silicon to seep through.
With the mould set up, the silicon and catalyst needed was calculated and mixed at 10 silicon to 1 catalyst by weight.
Miz had to be very well mixed making sure to scrape the silicon off the sides and bottom so all of it was mixed and no blobs or streaks of unmixed silicon which would not set or cure. Once toughly mixed this was poured in slowly from a height to give bubbles a chance to escape in the thin pour. The pouring was aimed to start in a corner and the flood to work its way into all nocks and crannies to avoid air bubbles in the case of fine detail so icon could be directly painted on to the sculpt or model first before the pour.
Once the mould is filled it’s a good idea to spend some time tapping and shaking to mould container, using a vibration device or ideally a vacuum chamber to hopefully release air bubbles trapped in the silicon. This helps bubble rise to the surface and not ruin things.
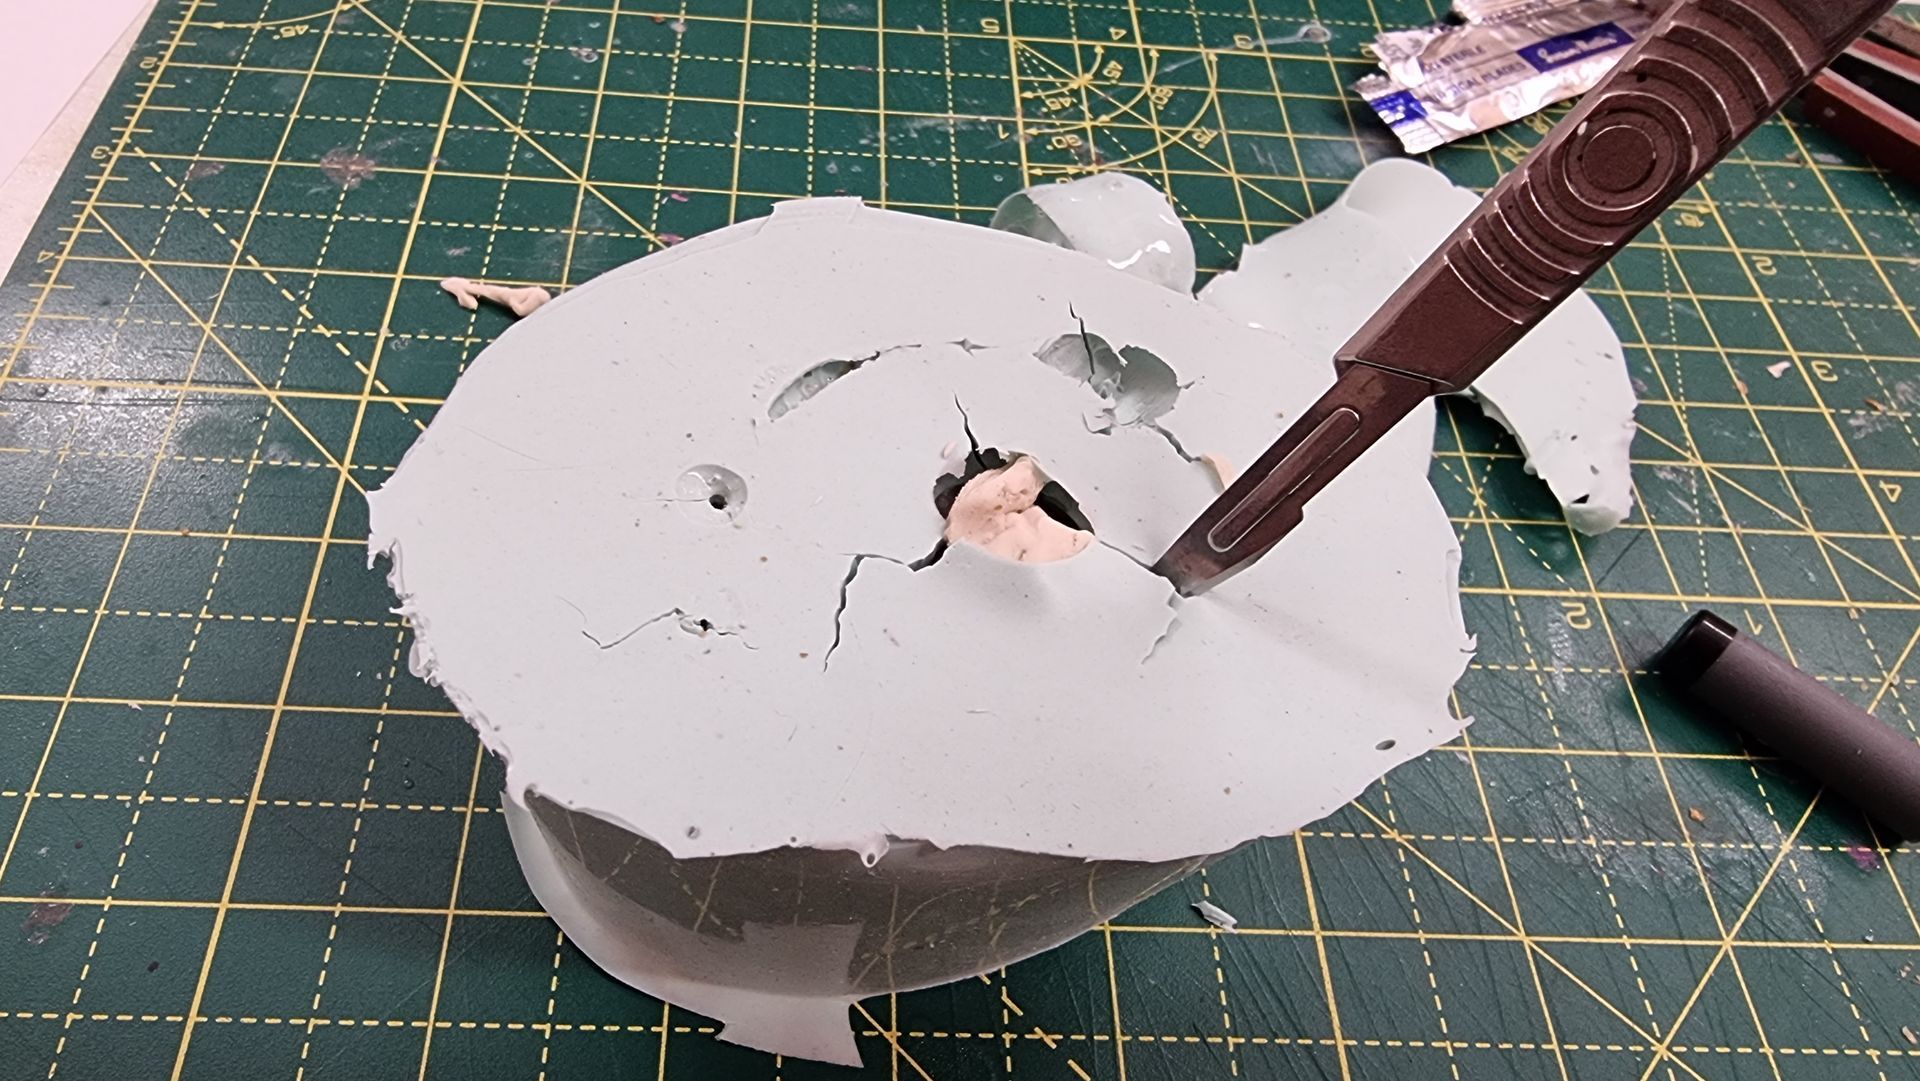
This is then left for hours then the mould is cut into in a zig zag pattern to help it mesh together again when full of resin with a very sharp knife to extract the Plastaline sculpt or other items being moulded. Often a fresh blade scalpel. Everything must be extracted. Sometimes this will be done with the first cast.


Resin Casting
To mould in a simple silicon box mould 1st the sculpts and items to be moulded were connected to a base such as foam board. When set the mould would be flipped over so the base becomes the top when pouring in resin.
Depending on the item to be moulded, if likely to create over hangs in the mould, which when flipped over could be where air could be trapped causing bubbles then air release channels would be added using foam board or Plastaline cones etc. The items could be placed on stalks if not flat bottomed, so the silicon could be formed around the sculpt.
A wall needed to be built around the items to be moulded with a minimum gap of 1cm around and above the items in the mould.
This wall could be made with Lego, but more commonly made with foam board or a cut mixing beaker. Whatever the case these were sealed with glue gun glue with no gaps for silicon to seep through.
With the mould set up, the silicon and catalyst needed was calculated and mixed at 10 silicon to 1 catalyst by weight.
Miz had to be very well mixed making sure to scrape the silicon off the sides and bottom so all of it was mixed and no blobs or streaks of unmixed silicon which would not set or cure. Once toughly mixed this was poured in slowly from a height to give bubbles a chance to escape in the thin pour. The pouring was aimed to start in a corner and the flood to work its way into all nocks and crannies to avoid air bubbles in the case of fine detail so icon could be directly painted on to the sculpt or model first before the pour.
Once the mould is filled it’s a good idea to spend some time tapping and shaking to mould container, using a vibration device or ideally a vacuum chamber to hopefully release air bubbles trapped in the silicon. This helps bubble rise to the surface and not ruin things.
This is then left for hours then the mould is cut into in a zig zag pattern to help it mesh together again when full of resin with a very sharp knife to extract the Plastaline sculpt or other items being moulded. Often a fresh blade scalpel. Everything must be extracted. Sometimes this will be done with the first cast.


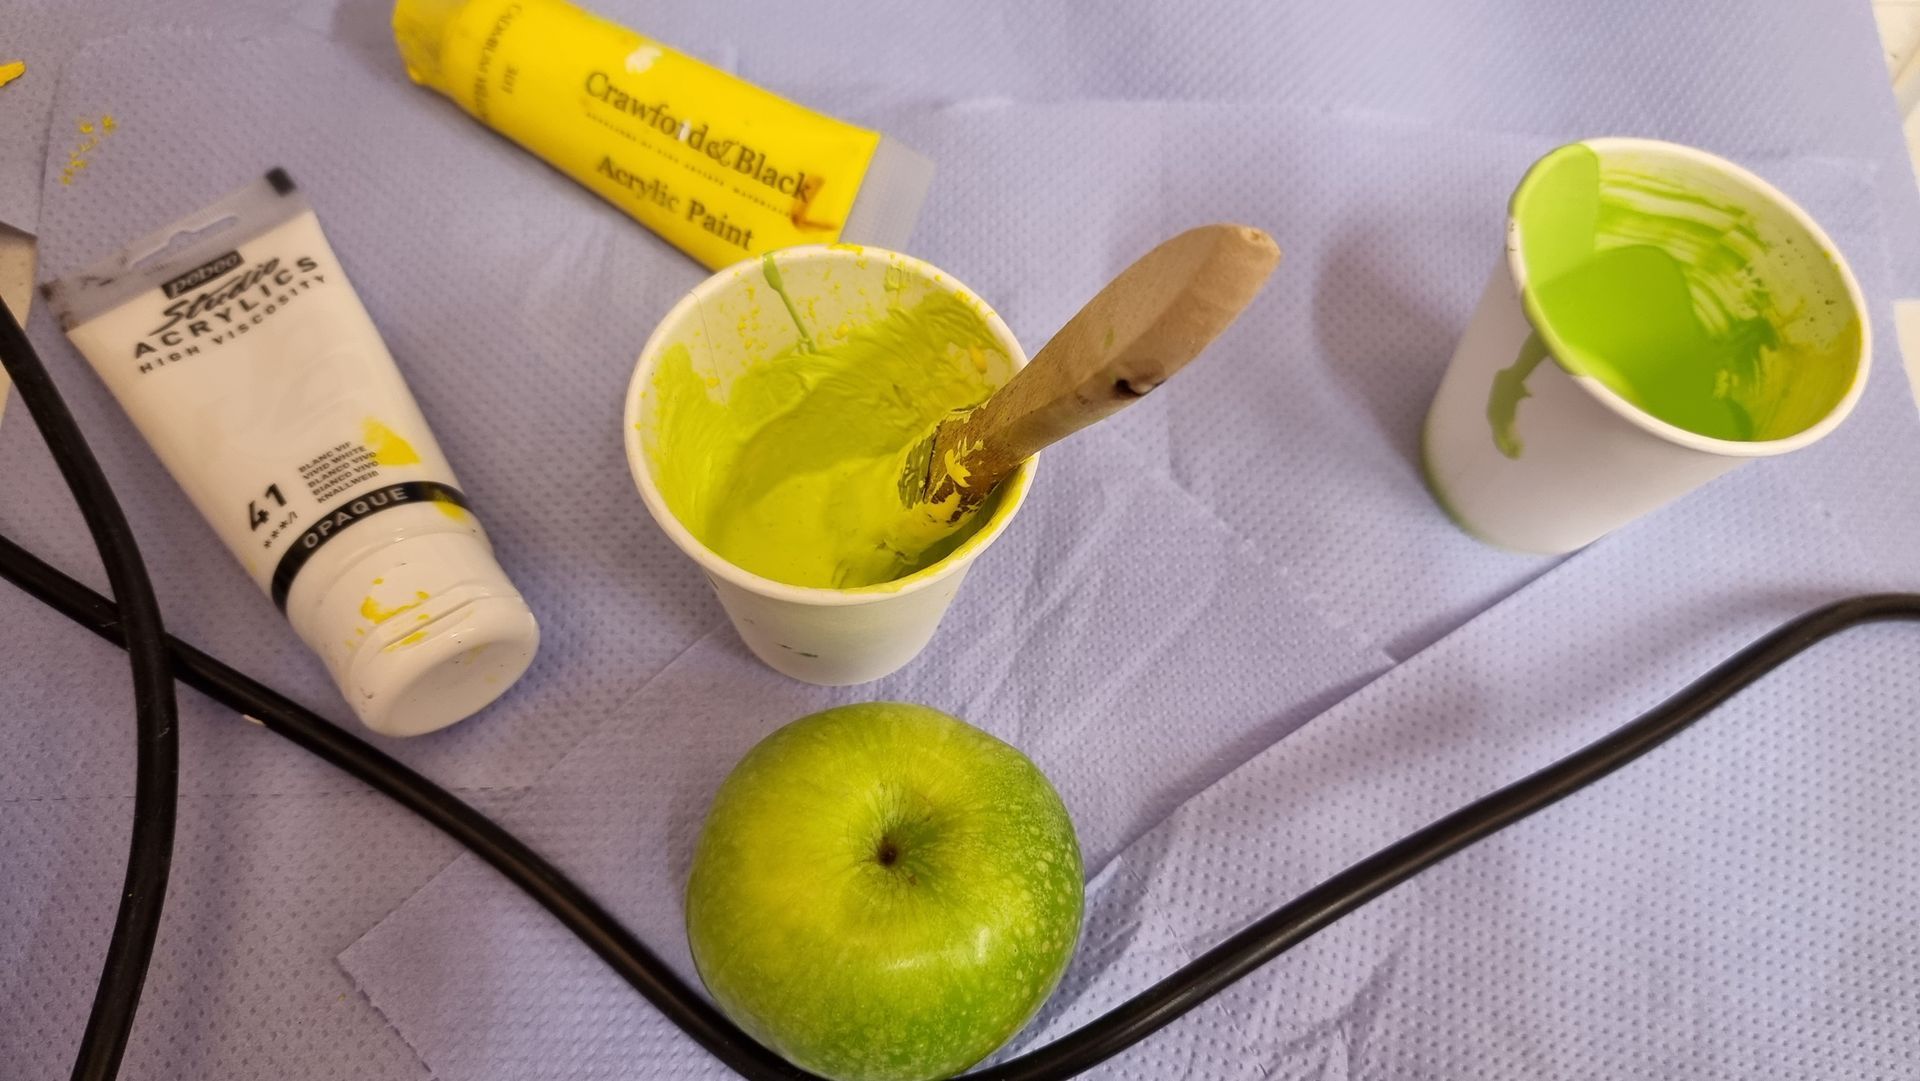
Painting and Adding Finishing Touches Leaves and Magots
Moving onto the painting. This was a lesson in how to use the basics or airbrushing with a gravity feed double stage air brush.
The acrylic water-based paint was thinned with water to make it milk like in consistency. Connected to a compressor then painted in light layers, letting each one dry.
Sparce hair brushes with hair yanked out was used to add streaks.
Paint was also soaked into a brush with stiff bristles. The bristles were then slid back to flick paint spots onto the side of the apple to add texture.
Torn sponges and plastic sheet or crushed foil could be used to tap the wet paint over the dry layers to help create patterns and texture. This was experimented with to try different effects.
As I found I could not get the patterns with the green apple close enough I switched to the very pale yellow and red patterns for more of a Coxes apple effect.
The leaves and the maggots/mealworms were painted separately before assembly. The maggots were painted with first dark brown then dry brushing the sandy beige main body colour to get a realistic dry meal work effect.
These were glued into place using Zap a Gap superglue with accelerator spray.
Lacquer was then sprayed over this.