


Star Wars Prop - Base Hacker System
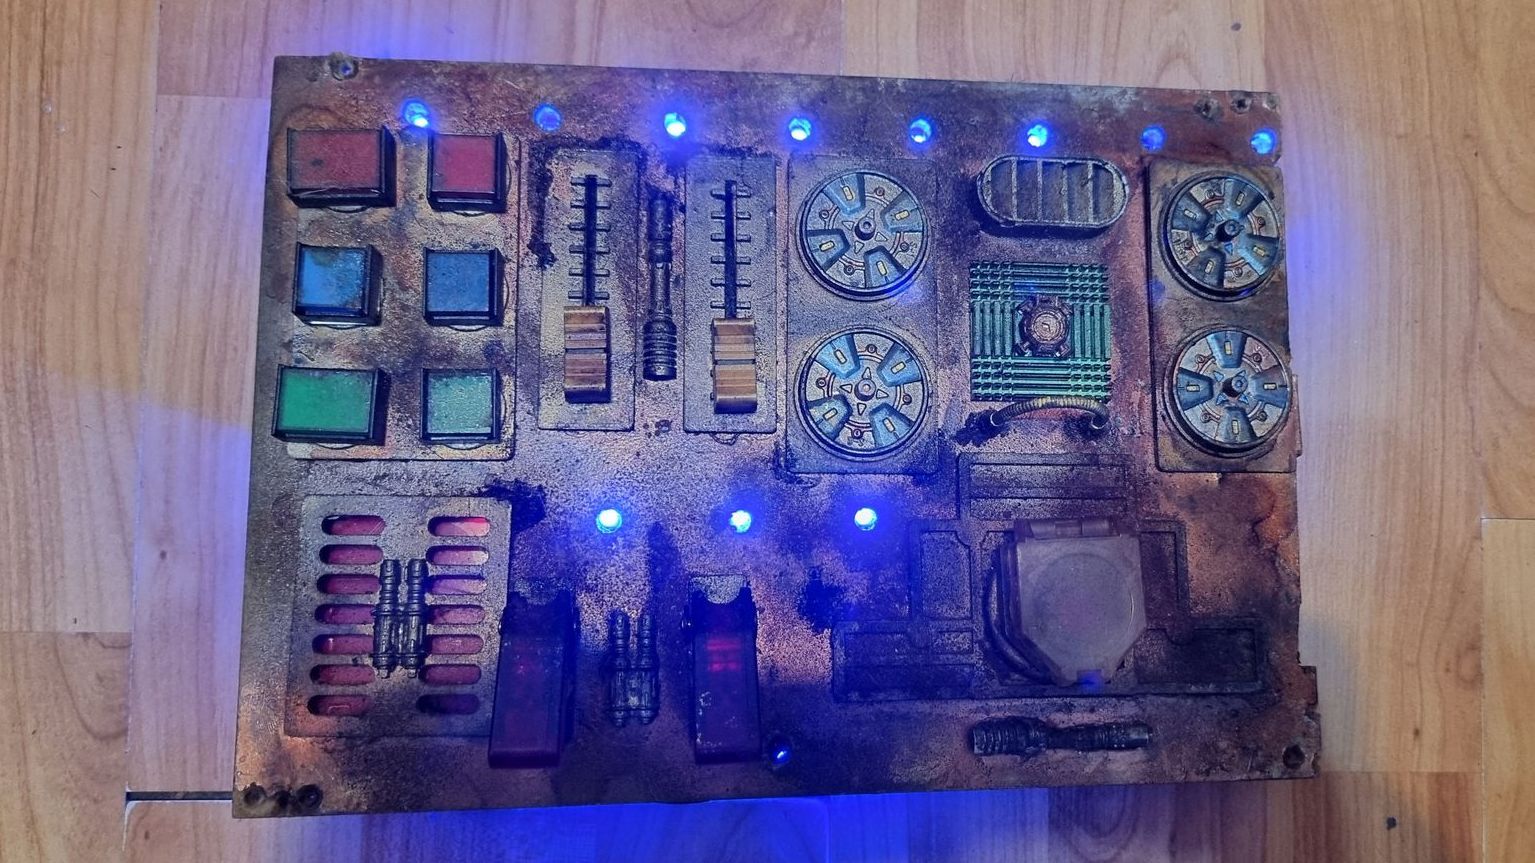
Electronics Left Wing Control Panel Upgrades
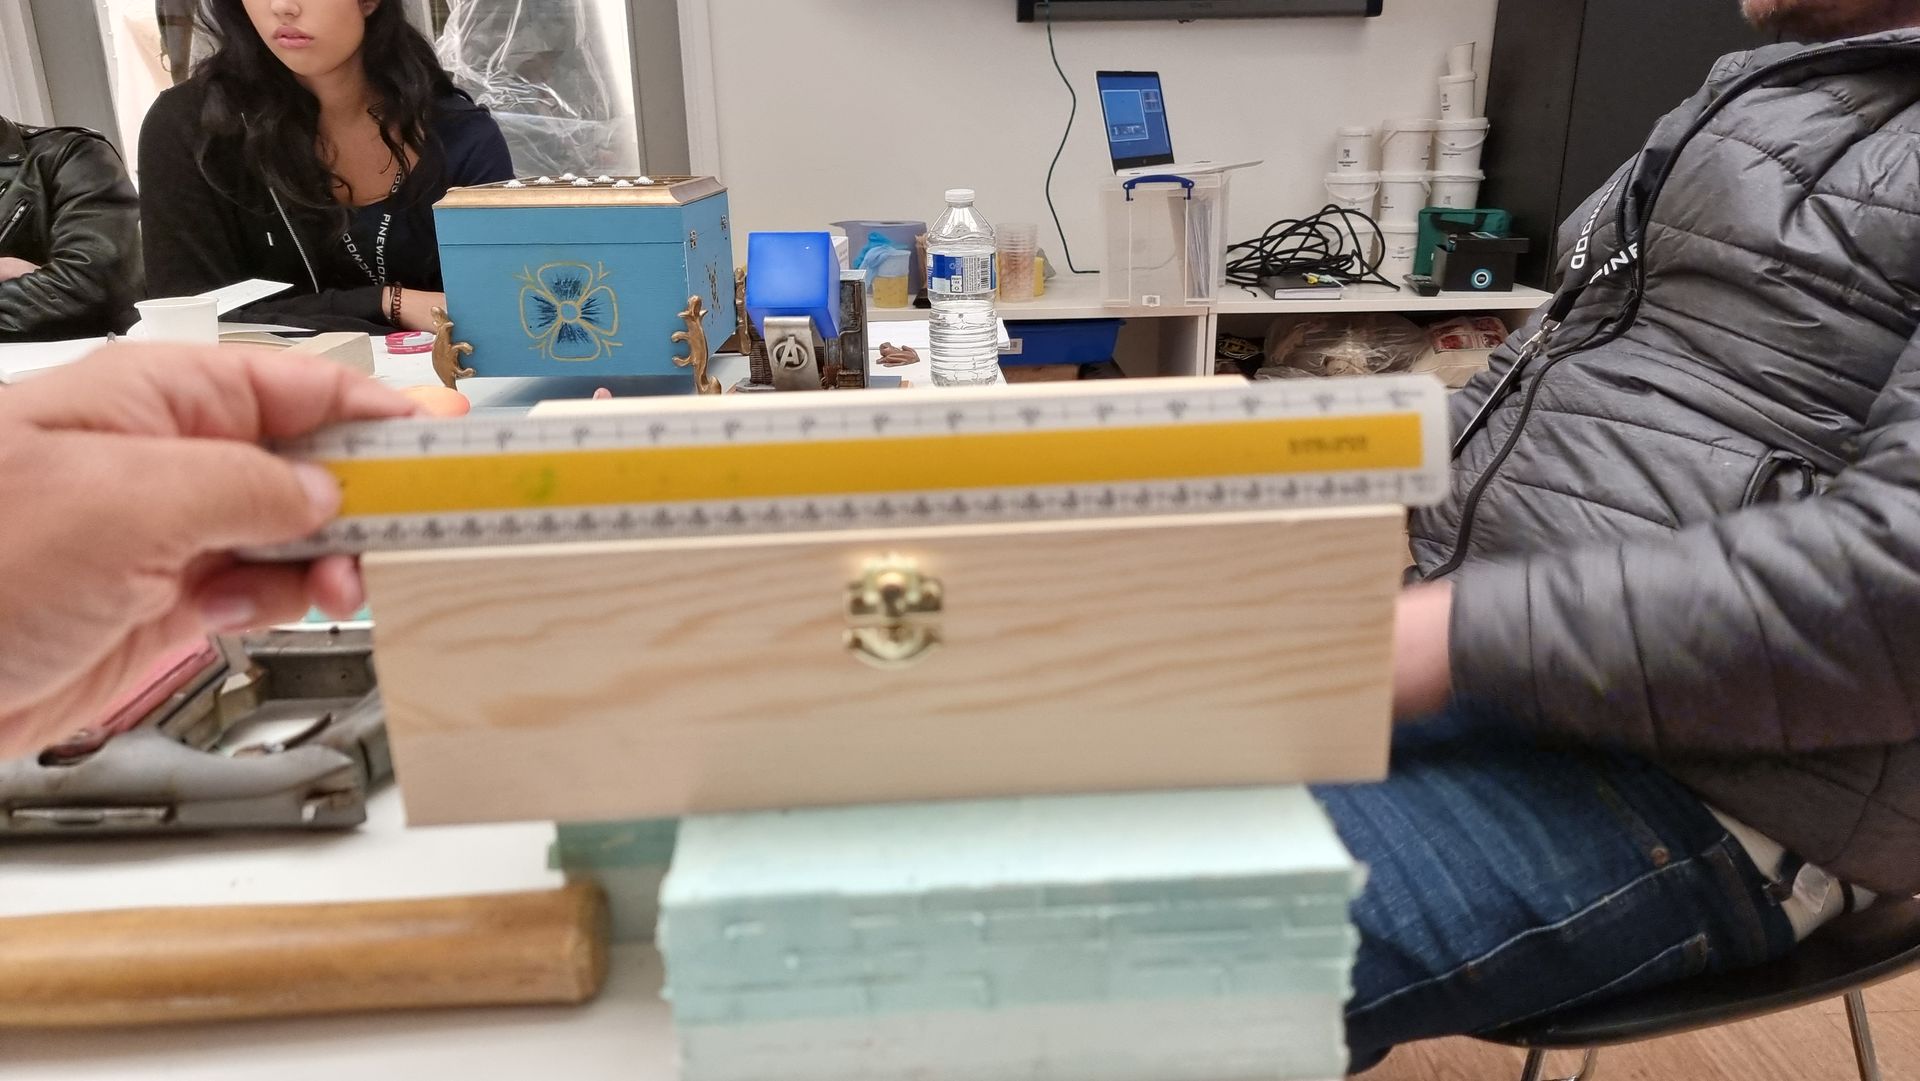
Wing Panels - Problems and Issues
Problems to Solve
- In addition to the unreliable electronics there was the issue of how to get at the electronics and the physical construction issues.
- When the prop was first built, I just went for the simple solution of screwing the panels to the 5mm wing box walls.
- Problems are with method are that:
- The walls are thing so the screws can break thought the sides.
- Continual screwing in and out just damages the wood both on the sides and panels requiring new location which ruins the appearance, making holes and broken wood.
- The fit is inconsistent and the screws may get in the way when closing the prop.
Solutions Inner Box and Holding Bolts
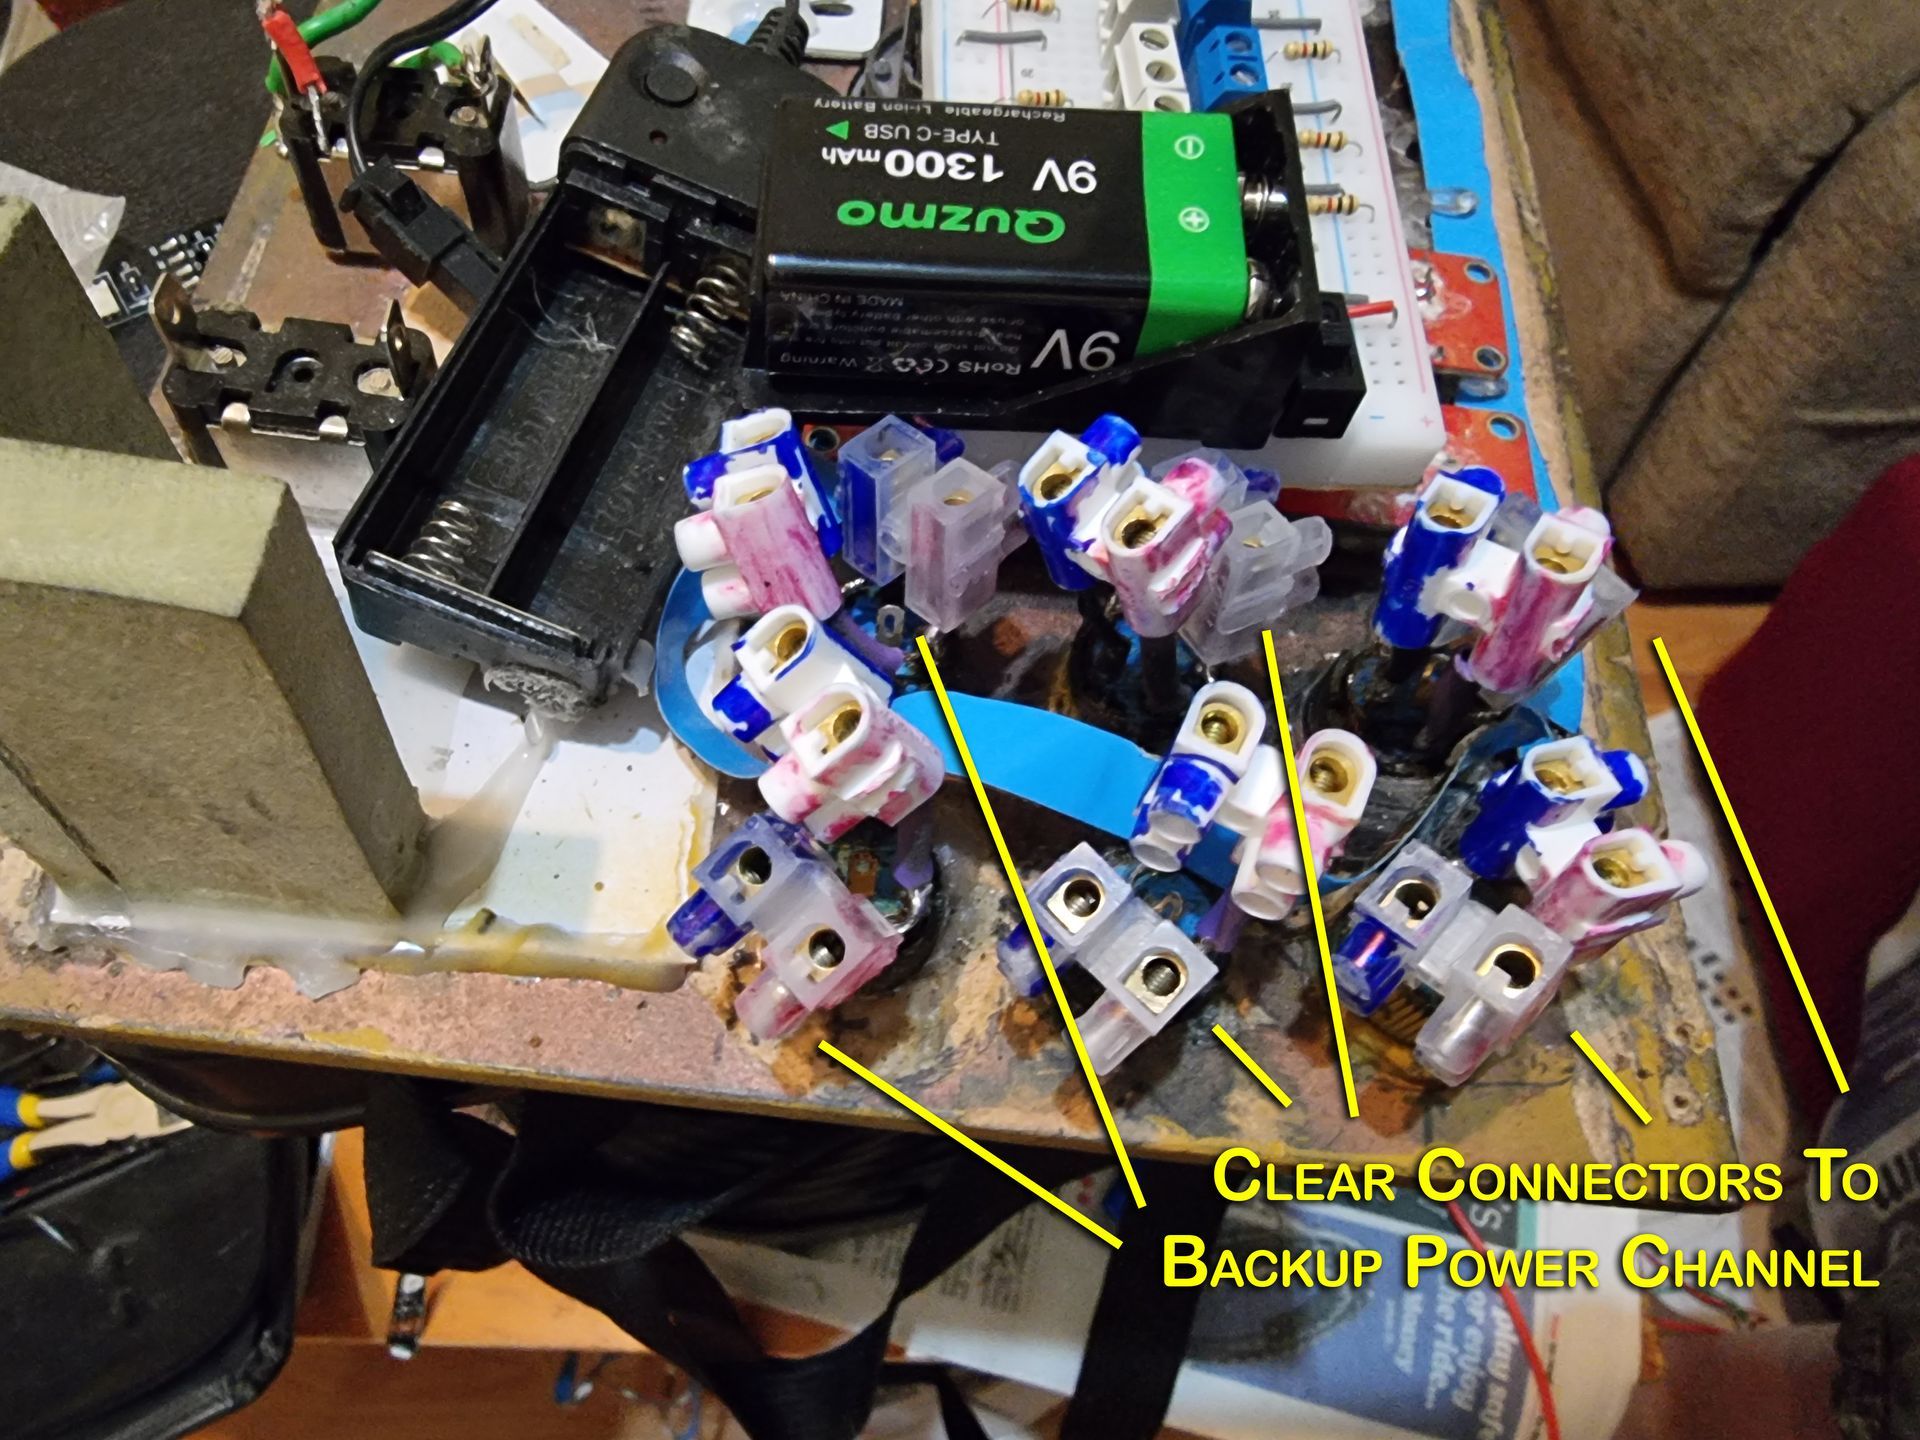
- Where possible backup power systems and connection channels were incorporated or added.
- Wire connections to the buttons were substantially strengthened, thickened and soldering was replaced by screw wire connection blocks. These added flexibility, easy maintenance, separated the button soldering from connections to the power board so less prone to damage.
- I decided with the new right hand wing box to add an inner set of walls so the inner and outer walls could interconnect and fit better and in a stable position.
- This also enabled me to fit holding bolts that when through both sets of walls and these bolds just slide in and out.
- They can be painted a similar colour to the walls.
- An alternative would be the attach some kit base components to these bolts to hide their true purpose.
- Thus, a quick and easy way to open and close them.
Left Wing Control Pannel Upgrades
Starting Point
The starting point here was the bad wiring of the left main control panel. I had just soldered wires to the buttons in a parallel pattern with resistors soldered directly to the buttons.
- The problem here was these resistors has thin wires very subject the breaking.
- As the buttons were connected in serial parallel patterns if one buttons wiring was faulty more failed.
- It was messy in regards the wiring and soldering.
- There was too much cross wiring in the button area making short circuiting much more likely needing rubber shrink wrap to try and prevent it.
- As the wiring around the buttons was all soldered, maintenance was problematic. Soldering in one spot melt soldering elsewhere and overt heats resistors leading to more breaks. It also melts the shrink rap.
- More breakable soldering is at the battery side.
- No backups meaning its can go wrong on the day.
- Components like the powerpacks were too loose, mov8ing and pressing into each other leading to wiring damage.
- The LED strips were loose, moving around and also when over bent could beat and cease to work or if penetrated by staples.


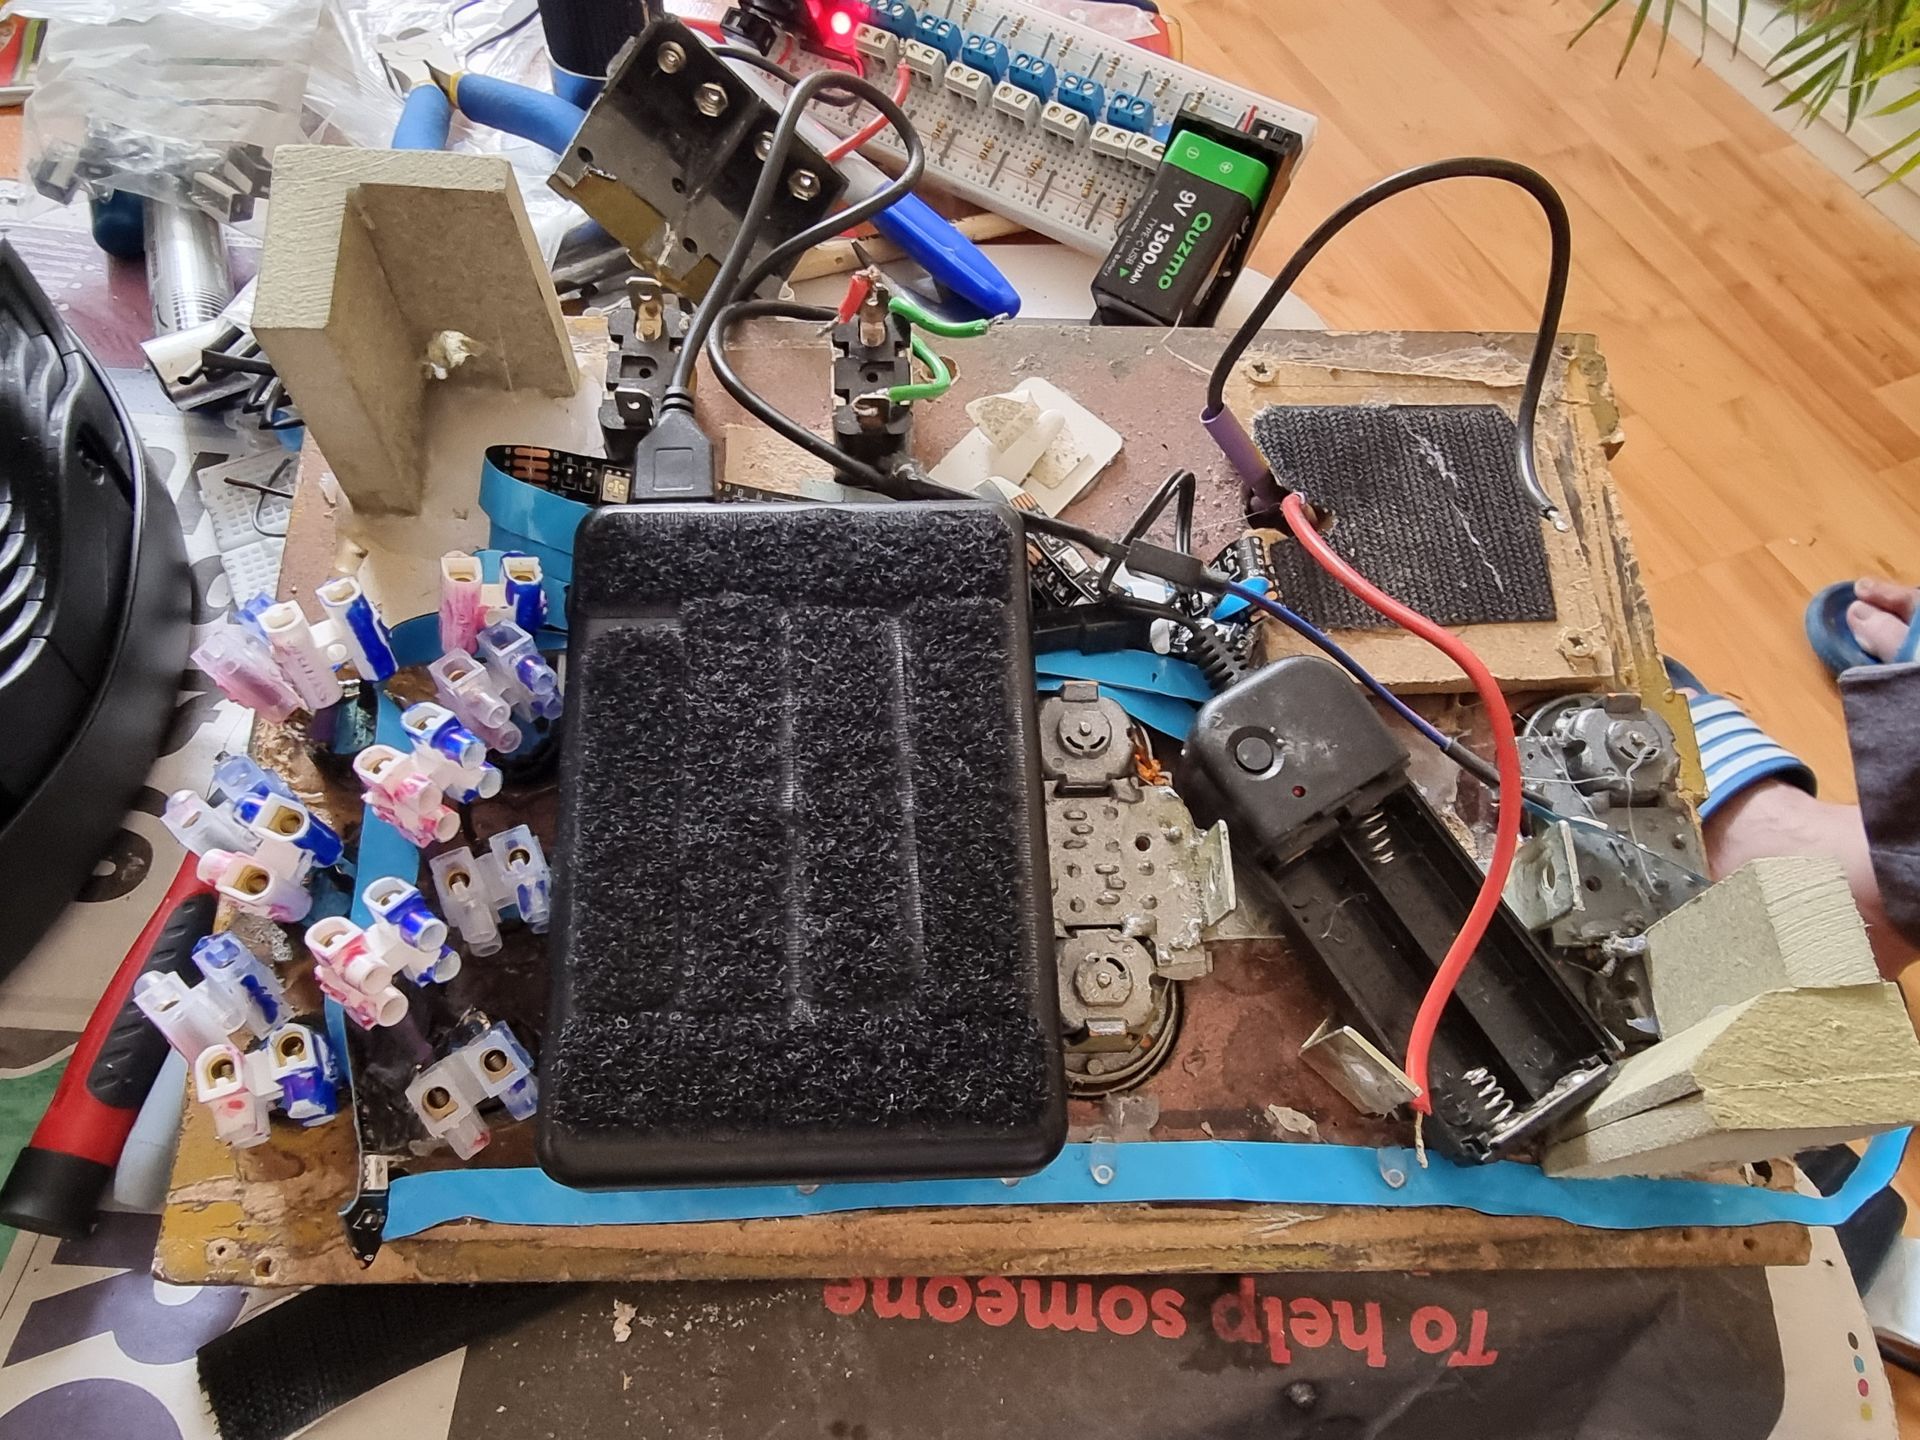
Securing Battery Packs with Velcro
The battery packs needed to be secured in place, especially given the problem with the damaged and loose LED strip ribbons. I used stick on Velcro, adding extra glue to bod the Velcro with the fluffy soft side on my battery packs so they could be carried in pockets when not used on the prob without scratching.


Replacing LED and Upgrading Attachment
When I installed the LED strips first time, having had a hard time trying to glue as nothing stuck, I had tried a staple gun which resulted in accidently putting a staple through the strips disrupting the wiring so it was flaky on and off and unreliable.
As well as velcroing the battery pack I found clips that I could pin the LED strips down with.
I used my glue gun to attach the clips as the glue that came with them was useless.
Some of the clips needed trimming to fit.
I also drilled a hole for the infra-red sensors on the receiver for remote control as my phone was to be in side the prop when being displayed.
What I still have a problem with is that the USB battery packs I have seem to have a sensor and timer on them which switches off after a short time which means I need to open the unit with an electric screw driver.
The LED strips consistantly failed and needed replacement, leading me to think of removing them all together or trying coloured light up ribbon not LEDs


Replacing Soldered Circuitry with Strong Cable Connectors
The wiring system needed replacing.
- The first task was to remove the current wiring with a soldering iron and pulling off the wiring and components.
- The relevant button pins were connected with about 2mm copper wire that was then tinned so stiff and hard.
- These where arranged in a U shape long enough to screw in connectors pointed up keeping them clear of each other.
- The twin soldered pins enabled a pair of 2 wire connectors per button, with some heat shrink rubber. The wire connectors were set to 2 hights so were clear of each other.
- I used 2 colour sets of connectors. White for the primary set of connection that could work on their own.


Replacing Soldered Circuitry with Strong Cable Connectors
It was clear that all the components like resistors needed to be moved to a solid circuit where the wiring would not be moved and broken and minimise the need for soldering.
During work on upgrading the right-hand panel I developed various progression forms of strip board. All bar one failed mostly due to the board’s poor quality and subject to the strips peaking off, breaking or meting when being soldered.
In addition the left-hand wing panel was much more complex, over twice the number of buttons so much more prone to failing during soldering.
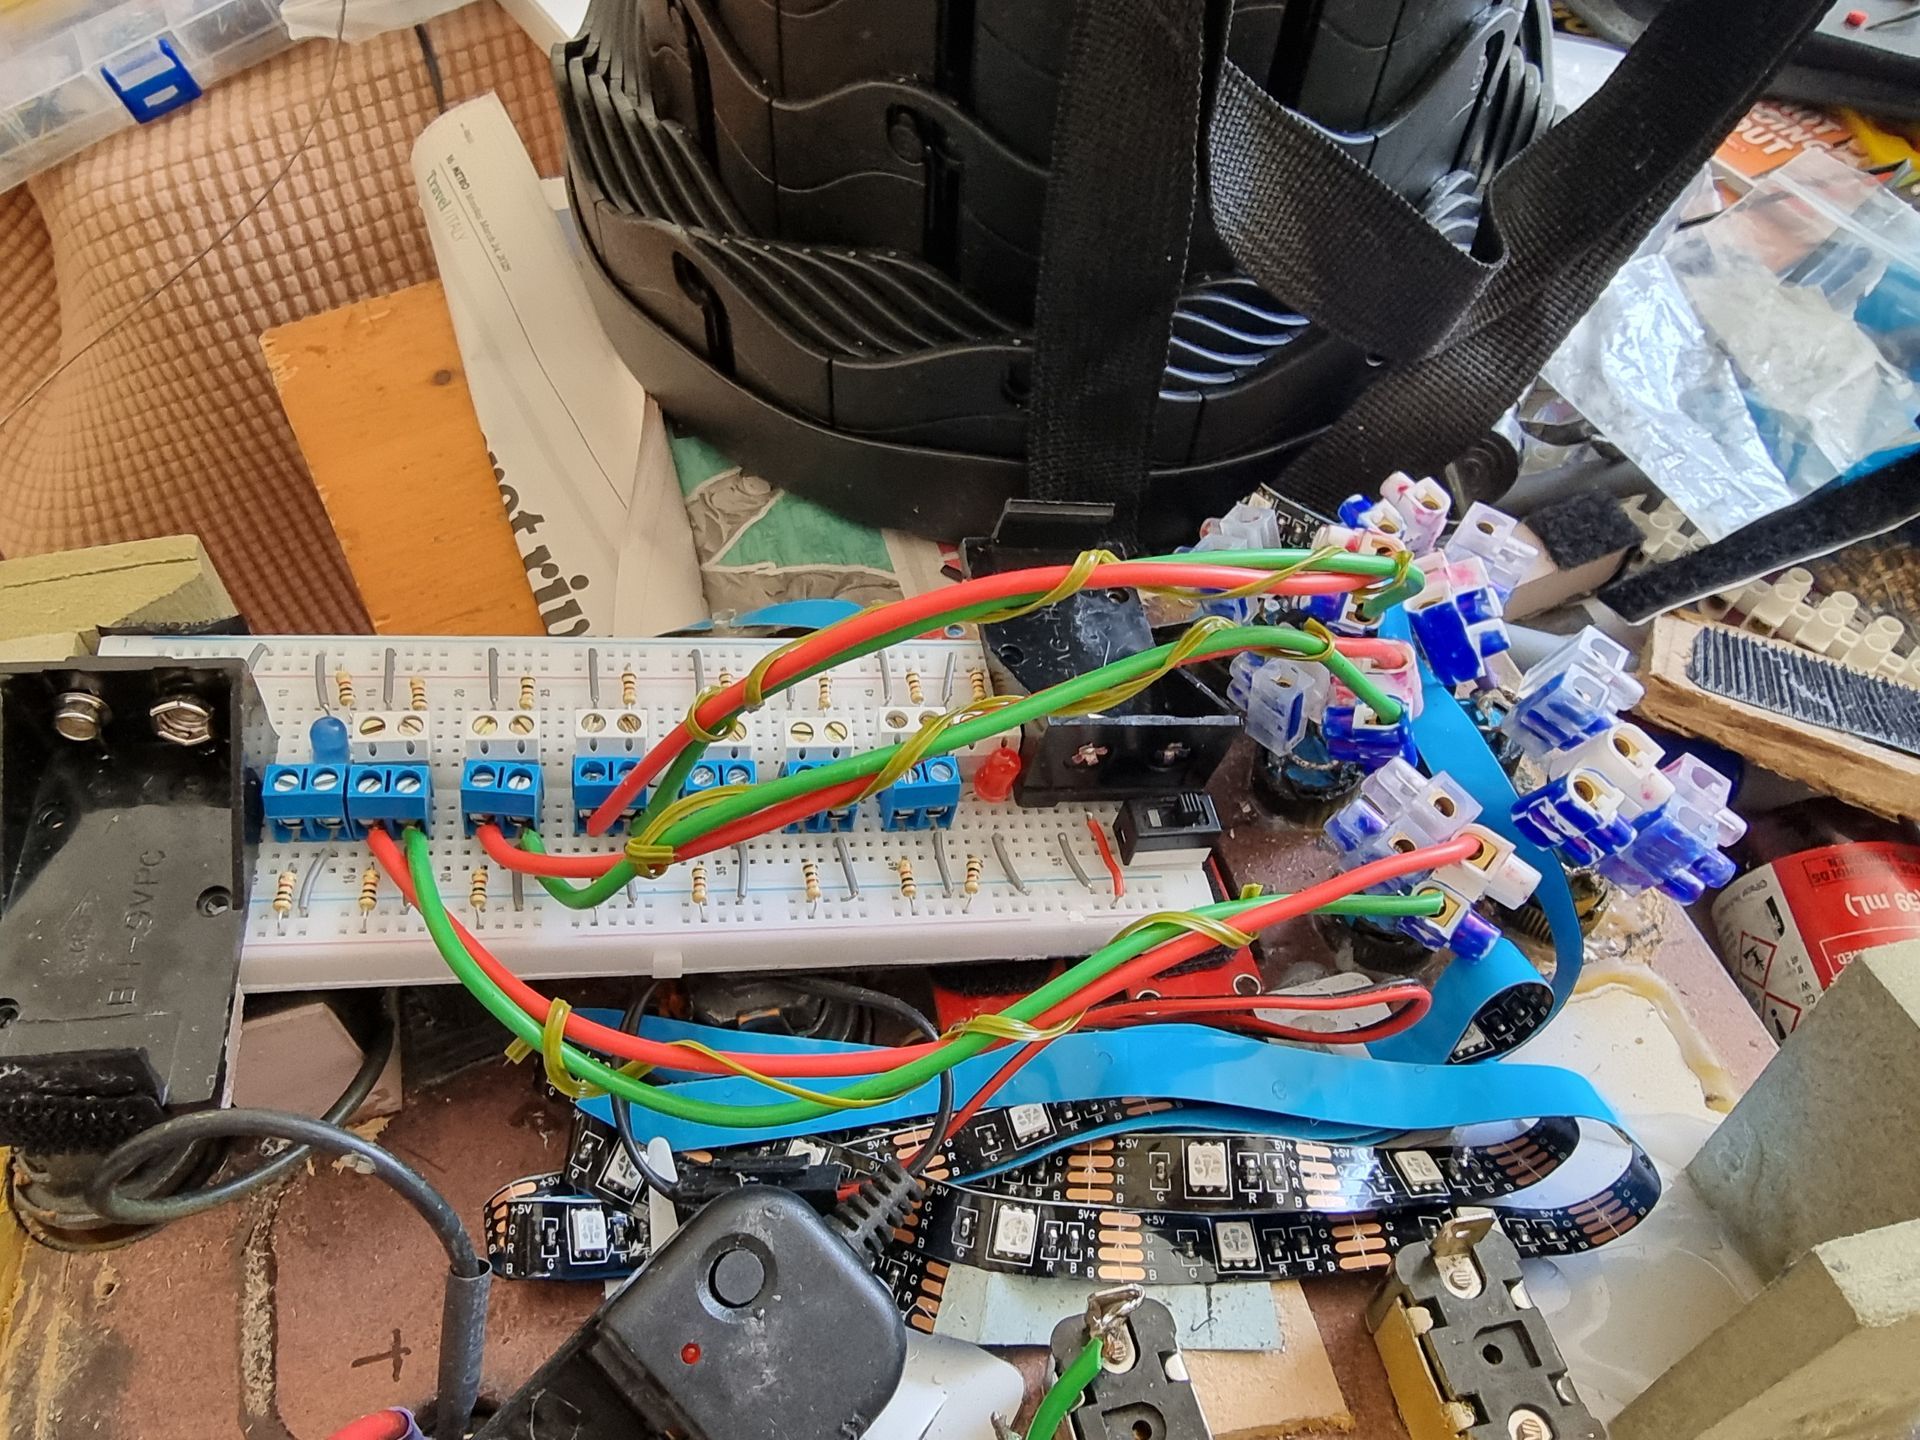
- I thus decided to switch to using a bread board which did not require soldering thus eliminating this problem. It did present the problem that the components were not solidly locked in place and could slide out. Whilst this was good for fixing errors, rearranging components and upgrades without damage from soldering destroying the circuit board, It would later need some glue gun use to hold the components in place.
- The breadboard circuit was designed as two separate circuits with one being backup redundancy.
- Each button had its own connection so if one had a problem, it could be dealt with separately to the others. These were also screw in rather than soldered so could be undone easy or retighten if the wiring came disconnected.
- An additional pair of connectors was added for the round fire button.
- A switch was added for each circuit and battery set along with an indicator LED so there was an option of using one circuit after the other to prolong battery life or both switched on to brighten the button lights.
- 1 K ohmn resistors were used one per button and LED to protect the batteries for short circuiting and blowing the batteries and well as the LEDS to stop them over loading and burning out.


Adding the Connection Wiring
- Each button got 2 pairs of wire to incorporate a backup.
- Using screw in wire connectors and flexible wires from buttons to the circuit board, combined with solid soldered pins on the actual buttons meant the stress from the wire movement occurs in the flexible wires and junction boxes not on the button connection.
- This also means the thing brittle wires resistors are not effects as pinned in the solid breadboard and thus not subjected to movement stress.
- There are separate primary and backup power circuits to the buttons.
- Each button has its own wiring, so one should not affect others.


Wiring the Fire Button
- Like the other buttons I first removed to old wiring from the round fire button, desoldering the resistor and wire.
- These was then replaced by 2 pairs of hard pin mins made from tinned 2mm wire.
- These were trimmed and screwed into wire connection blocks.
- The horizontal block was screwed into the panel to prevent it moving and damaging the wiring.
- The horizontal block was screwed into the panel to prevent it moving and damaging the wiring.
- The vertical pins trimmed to increase hardness as they were screwed into the second wire connection block.
- These were wrapped in heat shrink cable wrap.
- These were connected to the bread board with 2 pairs of 2mm wire, held with coloured cable wrap.
- In additionI noticed the button was slipping in and out of its hole so the button was secured with superglue.


Gluing in the Components
The problem with the use of a breadboard as opposed to a soldered circuit board is the components can slip out as only pegged in place, whilst unlikely for this to occur with the resistors and jumper cables the connector blocks under pressure were likely to slip out, the switches also appeared loose and frequently came out as did the batteries especially when the board was upside down due to battery weight.
I used a glue gun to hold these in place as there were gaps between each other, it was quick and could be removed if need be for maintenance but help the components in place


Tidying the Wiring
- Colour coded wire wrap was added to organise the wiring.
- Red for Primary Channel.
- Blue Secondary Channel
- Yellow for the trigger button. (I could not add a colour for its backup as was out of colours).
- Using the wire wiring also means its easy to remove for maintenance and to put back again.


Additional Battery Power
- I noticed having two batteries brightened up the buttons so thought I would incorporate two more batteries, 1 for each channel.
- As well as being brighter I thought this could result in them lasting longer.
- There was not room for these on the breadboard so I used to min breadboard for the satellite batteries and carefully connecting to be in series with the breadboard batteries sext before the negative battery inputs circuit wise as no room at the switch end.
- As out of colours, I incorporated a two-colour pattern for each battery connection with the cable wrap.
- In order to fit these in I moved the electroluminescent battery and control box from the Velcro patch plate below the trigger button to the bottom right pillar with the spare booster battery for the backup power channel.


Adding Holding Slots
With my multitool, slots were added to hold the led strips.


Flattening for Velcro
- To hold the power pack for the LED strips items like the sliding potentiometers rears were flattened with the multitool so Velcro would bond more securely.
- Pillars were also added, screwed and superglued in place to secure them to the board with velcro wrapped on top to make a level base combined with the powerpack covered in velco to hold the main circuit board in place


Combining this all Togther into One Unit
To finish up I restored the protective plate around the trigger button, bottom left so there was not pressure on its pin connections from what needed to be held with Velcro.
I combined a X of wood glue surrounded by glue gun glue to bond this. The wood glue should form a stronger bond than the glue gun glue soaking into the material but it takes a long time to set.
The glue gun glue sets quick but is weak. Combining both means I should get a strong bond that is held with the glue gun glue whilst the wood glue set.
I tried positioning wrapped cable, then the electroluminescent panel battery pack and control here.
I then found the extra wire for the LED strings could be tucked in under the breadboard where the electroluminescent batter box originally was.
The electroluminescent battery box was moved to be held with Velcro on the non-functioning covered switches middle bottom and Velcro on the bottom right pillar.
The primary channel bonus battery could be Velcroid on the trigger bottom place bottom left.
The backup bonus batter Velcroed to the bottom right pillar alongside the electroluminescent box.
In the middle the USB powerpack is Velcroid down and connected up, on top of this goes the breadboard.
The wiring groups get held together with Velcro tape.
This forms the self-contained control panel unit that slots neatly into the left wing box.


Bolting into place
The original way to connect the panels to the wing boxes was just the screw them down.
This however by this only caused damage and problems closing up the tower box due to bad fitting.
In addition, this requires me to carry and electric screwdriver.
I fixed this by adding support pillars in the corner as could not make a surrounding wall like the right panel unit due to too many components in the way,
I then drilled through the sides of the wing box into these pillars so bolts could be simply slid into these holes bolting the panel unit into the size of the wing boxes


