
Star Wars Prop - Base Hacker
Transport Case - Electronics
Electronics and Lighting
To create a more Star Wars feel I wanted to add some technology to light up the prop and look like it could do actions as well as the kit bashing.

Electronics and Lighting Issues
To create a more Star Wars feel I wanted to add some technology to light up the prop and look like it could do actions as well as the kit bashing.
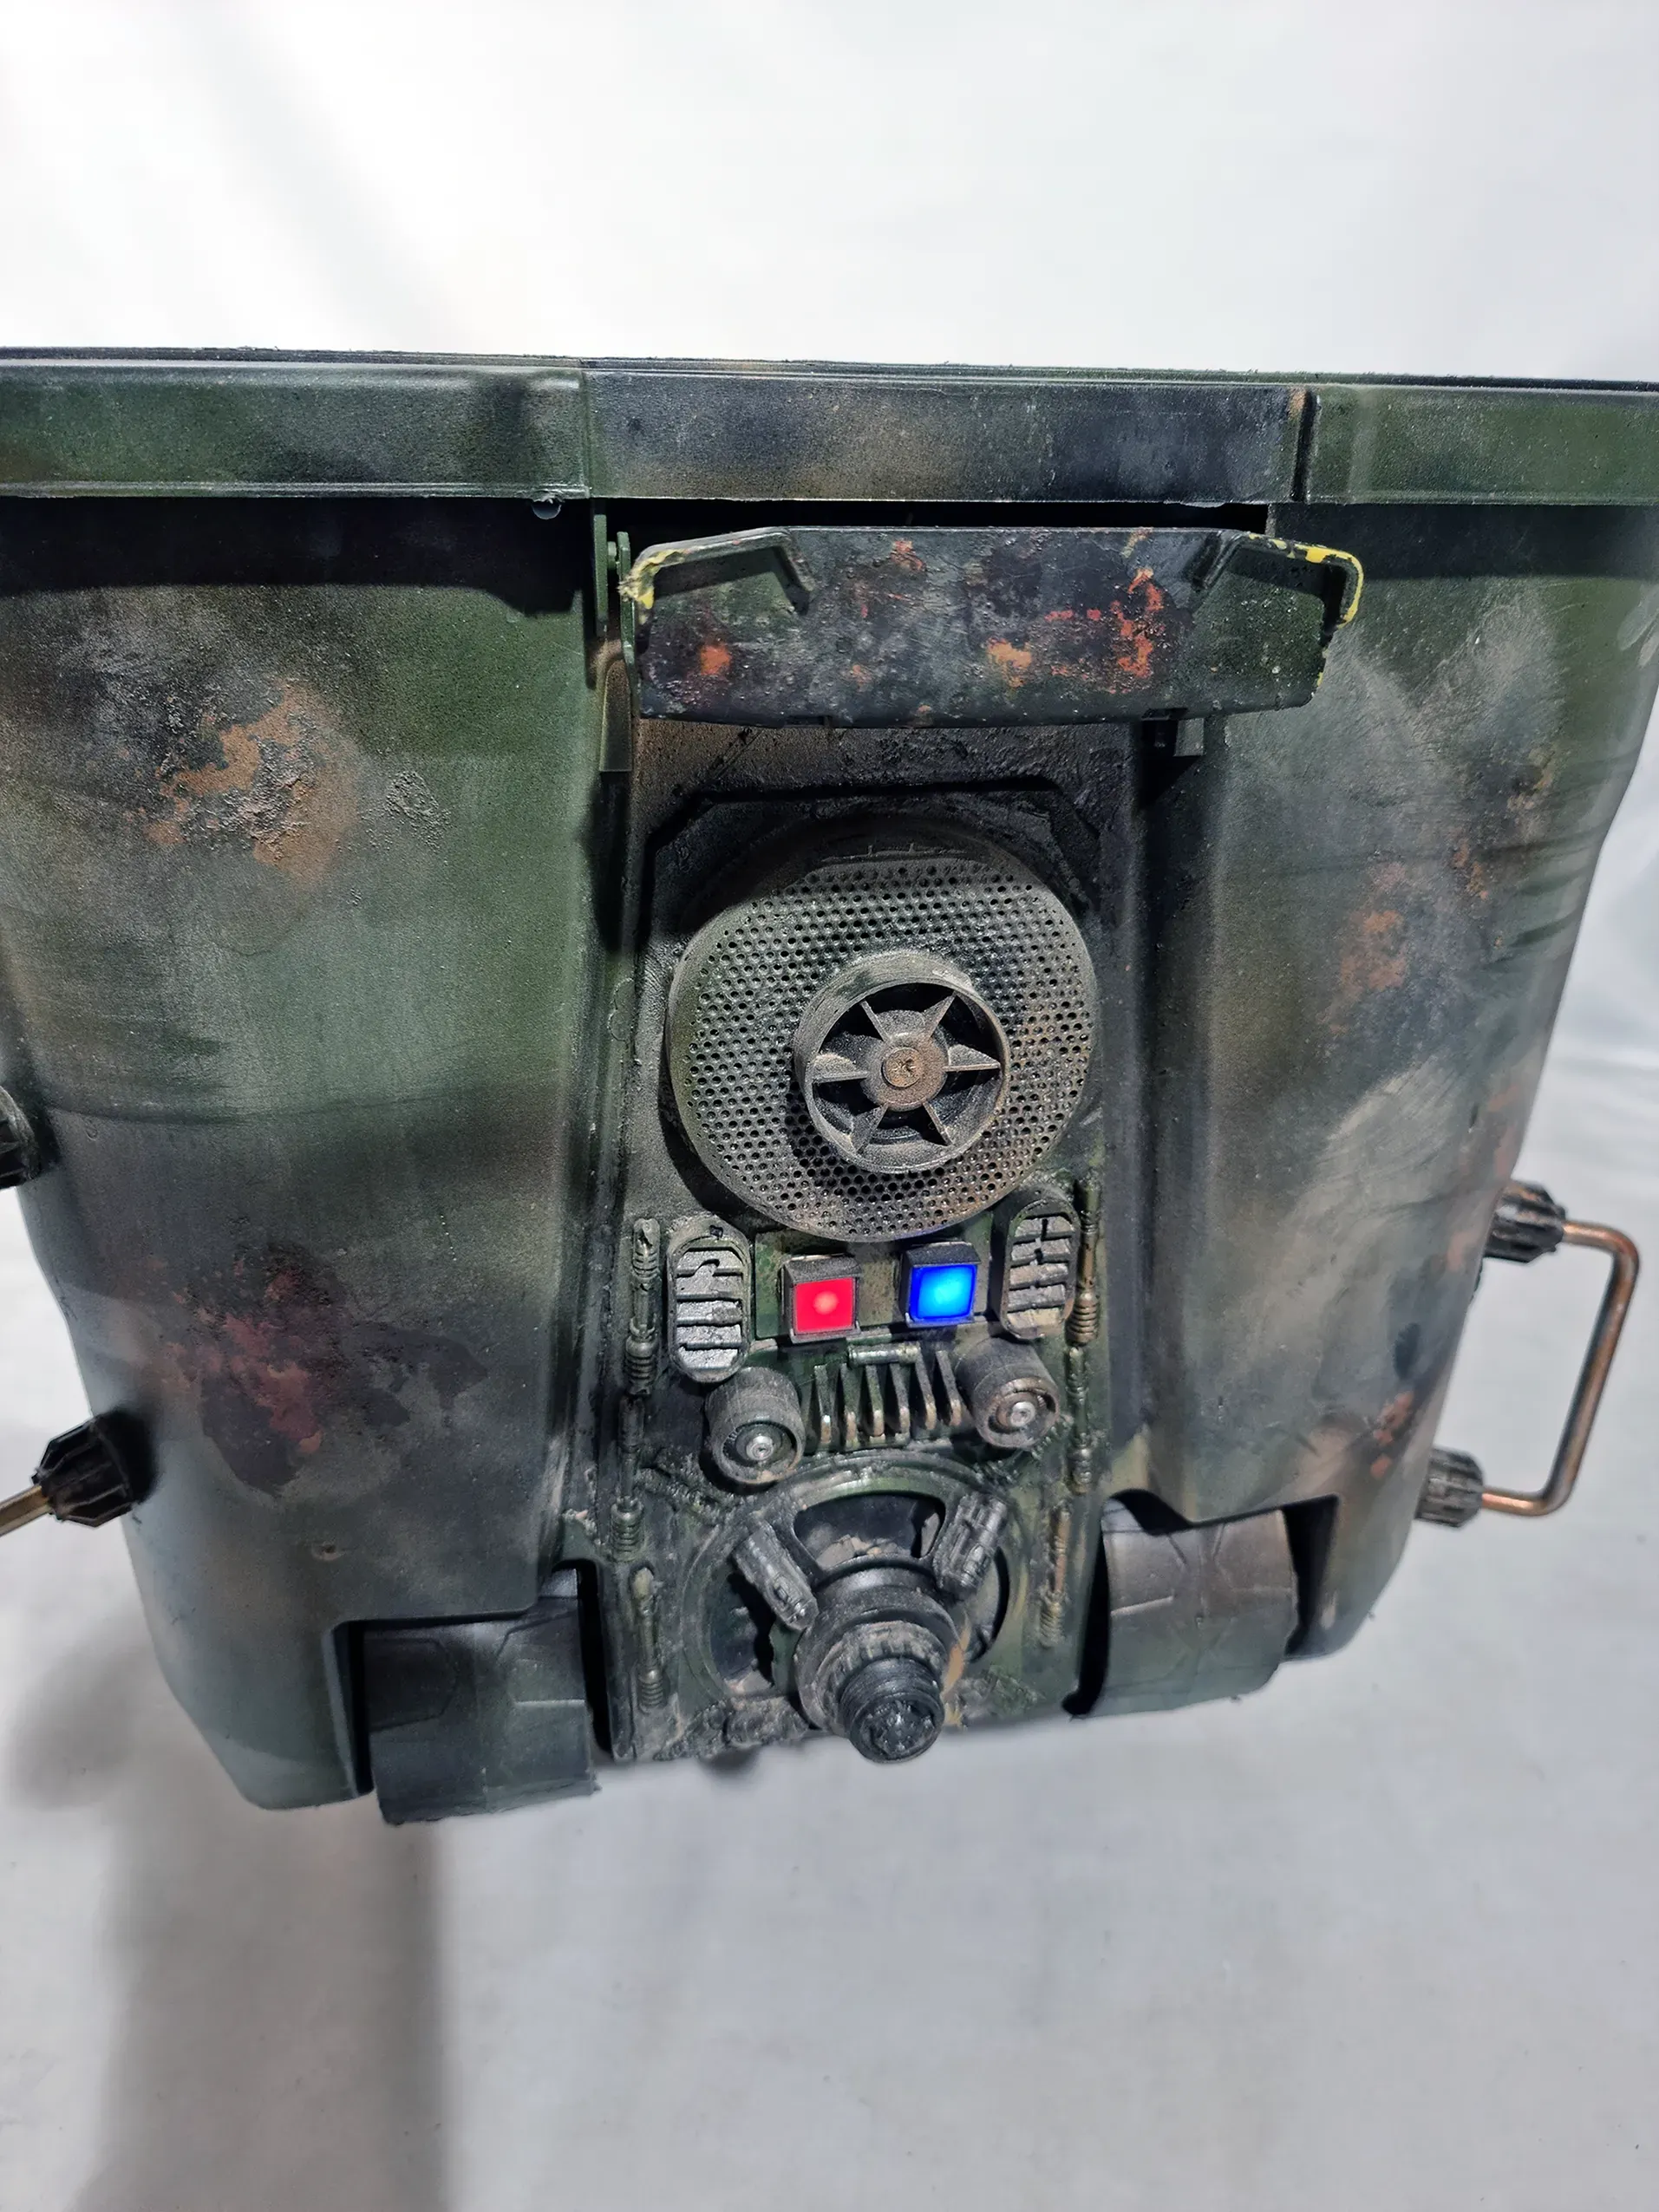
Some buttons that could light up could look useful on the ends, front or the lid.
Redundancy is to be incorporated to increase reliability to prevent things going wrong on the day of interviews etc.


Previous Attempts and Problems that Needed Fixing
A problem with the light up switches are the pins are wide, thick and designed to connect leads not fit into a circuit board, strip or bread board.
When I made the light-up panels, for the tower I had loosely soldered the illuminated switches, resisters and other components directly to each other and which lead to constant broken soldering and wires causing the prop to fail.
This time I wanted to place the components directly, tightly and solidly soldered onto a circuit board, with proper screw in connections, properly held to the case. In addition to this to incorporate redundancy and backups into the system.
Previous experience with frequent failing RGB LED strips put me off these. Nice idea but unreliable.
As I did not have the equipment to etch or CNC the copper to make proper circuit boards, I started to look at the likes of copper backed strip boards.


Components
Some buttons that could light up could look useful on the ends, front or the lid.
I was also looking into electroluminescent panels and string.
1 K ohm resistors were needed to prevent the batteries shorting out burning up and blowing holes in them, as can be seen Right >>>.
Whilst I could design a circuit diagram, the practical implimentation of this was something else due to practical issues with soldering boards.
Some buttons that could light up could look useful on the ends, front or the lid.
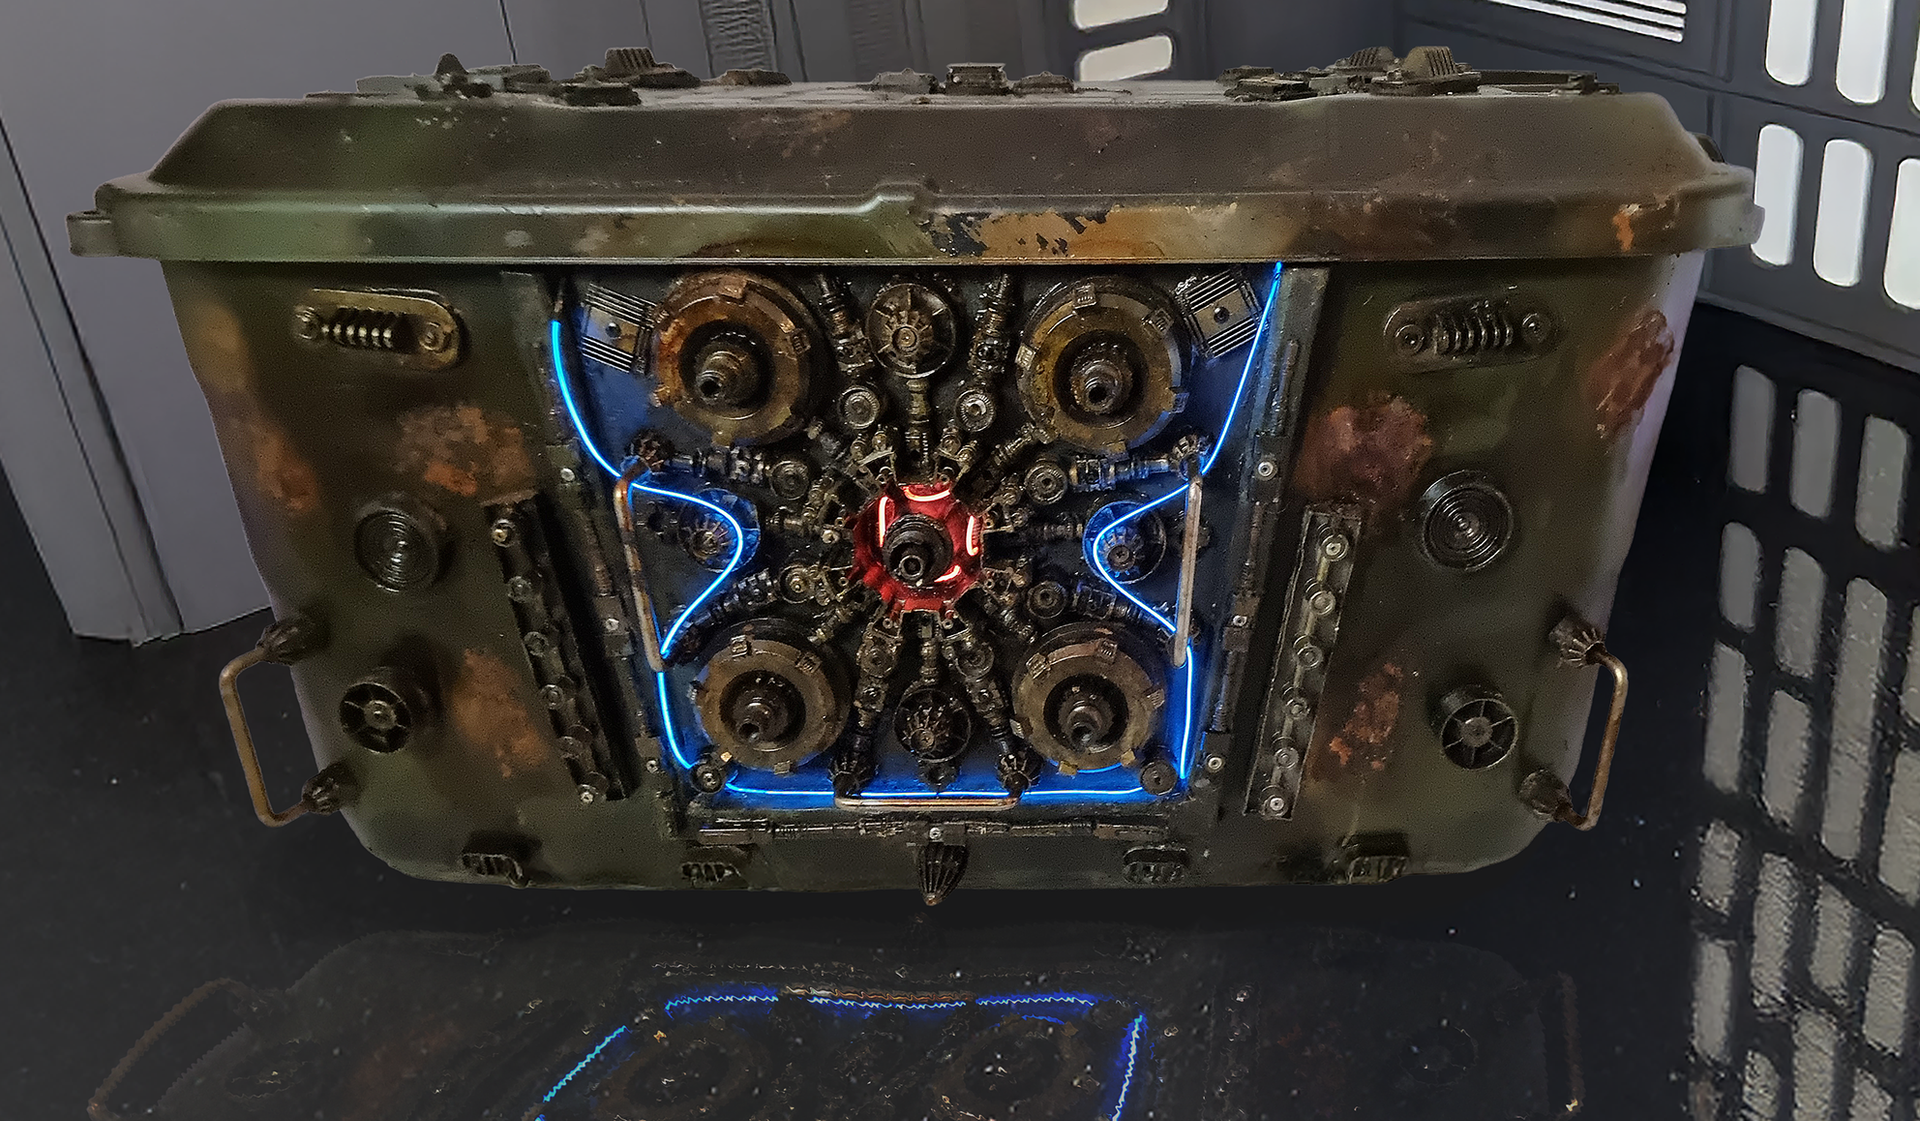
Red and blue seem popular in the Star Wars universe so I chose them to be my main lighting.
I was also looking into electroluminescent panels and string. Previous experience with frequent failing RGB LED strips and the powerpacks auto switching off after a short time, put me off these and need something reliable that wont go wrong on the day.
I also found batteries in the shape of 9v PP3 batteries that charge far quicker from phone usb chargers and velco to attach the circuit boards..


Attempt 1 : Strip Board - Basic
My first attempt with the strip board as aimed to be as small as possible so very compacted.
It was also basic, Just the battery clip for the PP3 battery, a on switch, twin screw in connector to lead to the light up button and protective resistor to prevent shortage.
I would need a separate board for each button or separate circuits on a board.


Attempt 2 : Strip Board - Basic with Armed LED Indicator
Adding an LED with a protective resistor gave an indication if the circuit was powered and live.
So switch on the arming switch that lights up the LED so the user knows the system is working before turning on the push buttons.
Bigger triple connectors were applied to allow connection of two Illuminated switches.
Whilst the positive leads have one connector each the ground had to be shared causing problems fitting the leads in the slot.


Attempt 3 : Strip Board - Add Dual Routing & LEDS Redundancy
The next iteration and improvement was to add an additional screw connection which enabled better fitting of leads to the illuminated leads as well as double routing as well as a secondary LED so if one failed or got damaged the second route would work.


Strip Board Solder Issues
With all 3 of these iterations, I found several problems with the strip boards.
The strips were too close together leading to lots of cross over solder spills.
When this happens, I needed to resolder and to use solder suckers.
This just resulted in the copper strips breaking, which lead to more over soldering and use of solder suckers which made it worse.
Part of this was that the copper strips were not well bonded to the fibreglass. When resoldering and solder sucking the strips lift off the boards.
The result on all 3 is a lot of mess and failed boards, wasted components needing disposal.
This was the case with several different sized board from several brands.
In addition most boards were the wrong size.


Attempt 4 : Project Board
Having had problems with strip boards I though I would try what looked like green higher technology project boards which had shorter strips.
This was no better, in fact to was worse as given the strips where just 3 holes long which made connecting and soldering even harder.
This circuit included double pairs of 4 positive connection ports which allowed for connecting 4 lights up buttons, 2 light up buttons and two other items or simple 2 spare connections. However, there were only 3 ground ports. I LED on Indicator was included, all using 1 k ohm resistors and more connecting wires.
Again this had problems with the copper metal lifting up and resoldering making things worse.


Illuminated Light Up Buttons - Adding Pin Connections,
I found the way to get the illuminated switches to work was to solder leads to connect the:
- Positive Pin to the Common Pin
and the
- Normally Closed to the Negative Pin
These reduce the pin connections to positive from the main arming switch and ground.
This also provided space to have two connections each to aid with redundancy dual routing.
I used stiff wire to do this from spare LEDS. It enabled me to operate single positive and negative connectors to go to the circuit board or double leads.


Illuminated Light Up Buttons - Connecting to Circuits
When I was making the panels for the tower as mentioned I had just soldered the pins to wire to the battered and directly soldering resistors needed to protect the buttons.
This as mentioned did not work as weak and kept breaking, mostly with the resistors as have very thin wire pins.
I added soldered tinning with additional wire to thicken wires and cover in heat shrink sleeving, but this did not help.
That’s was when I switches to putting the resistors and other components on circuit boards leaving just the wire connections.
To do this I ran twisted thicker single wires thorugh the holes in the pins with about 2 cm extensions which were all tinned.
Theses were in line with the pins aiding insertion of the putting though the body of the case. The buttons where then held in place with hot glue gun glue.
I then thick 2 – 3 mm cable connectors onto these s the wires to the circuit boards could be unscrewed for maintenance and swapping of circuit boards.
This was a much stronger and reliable option.


Attempt 5 : Breadboard Full Double Redundancy for Whole Case
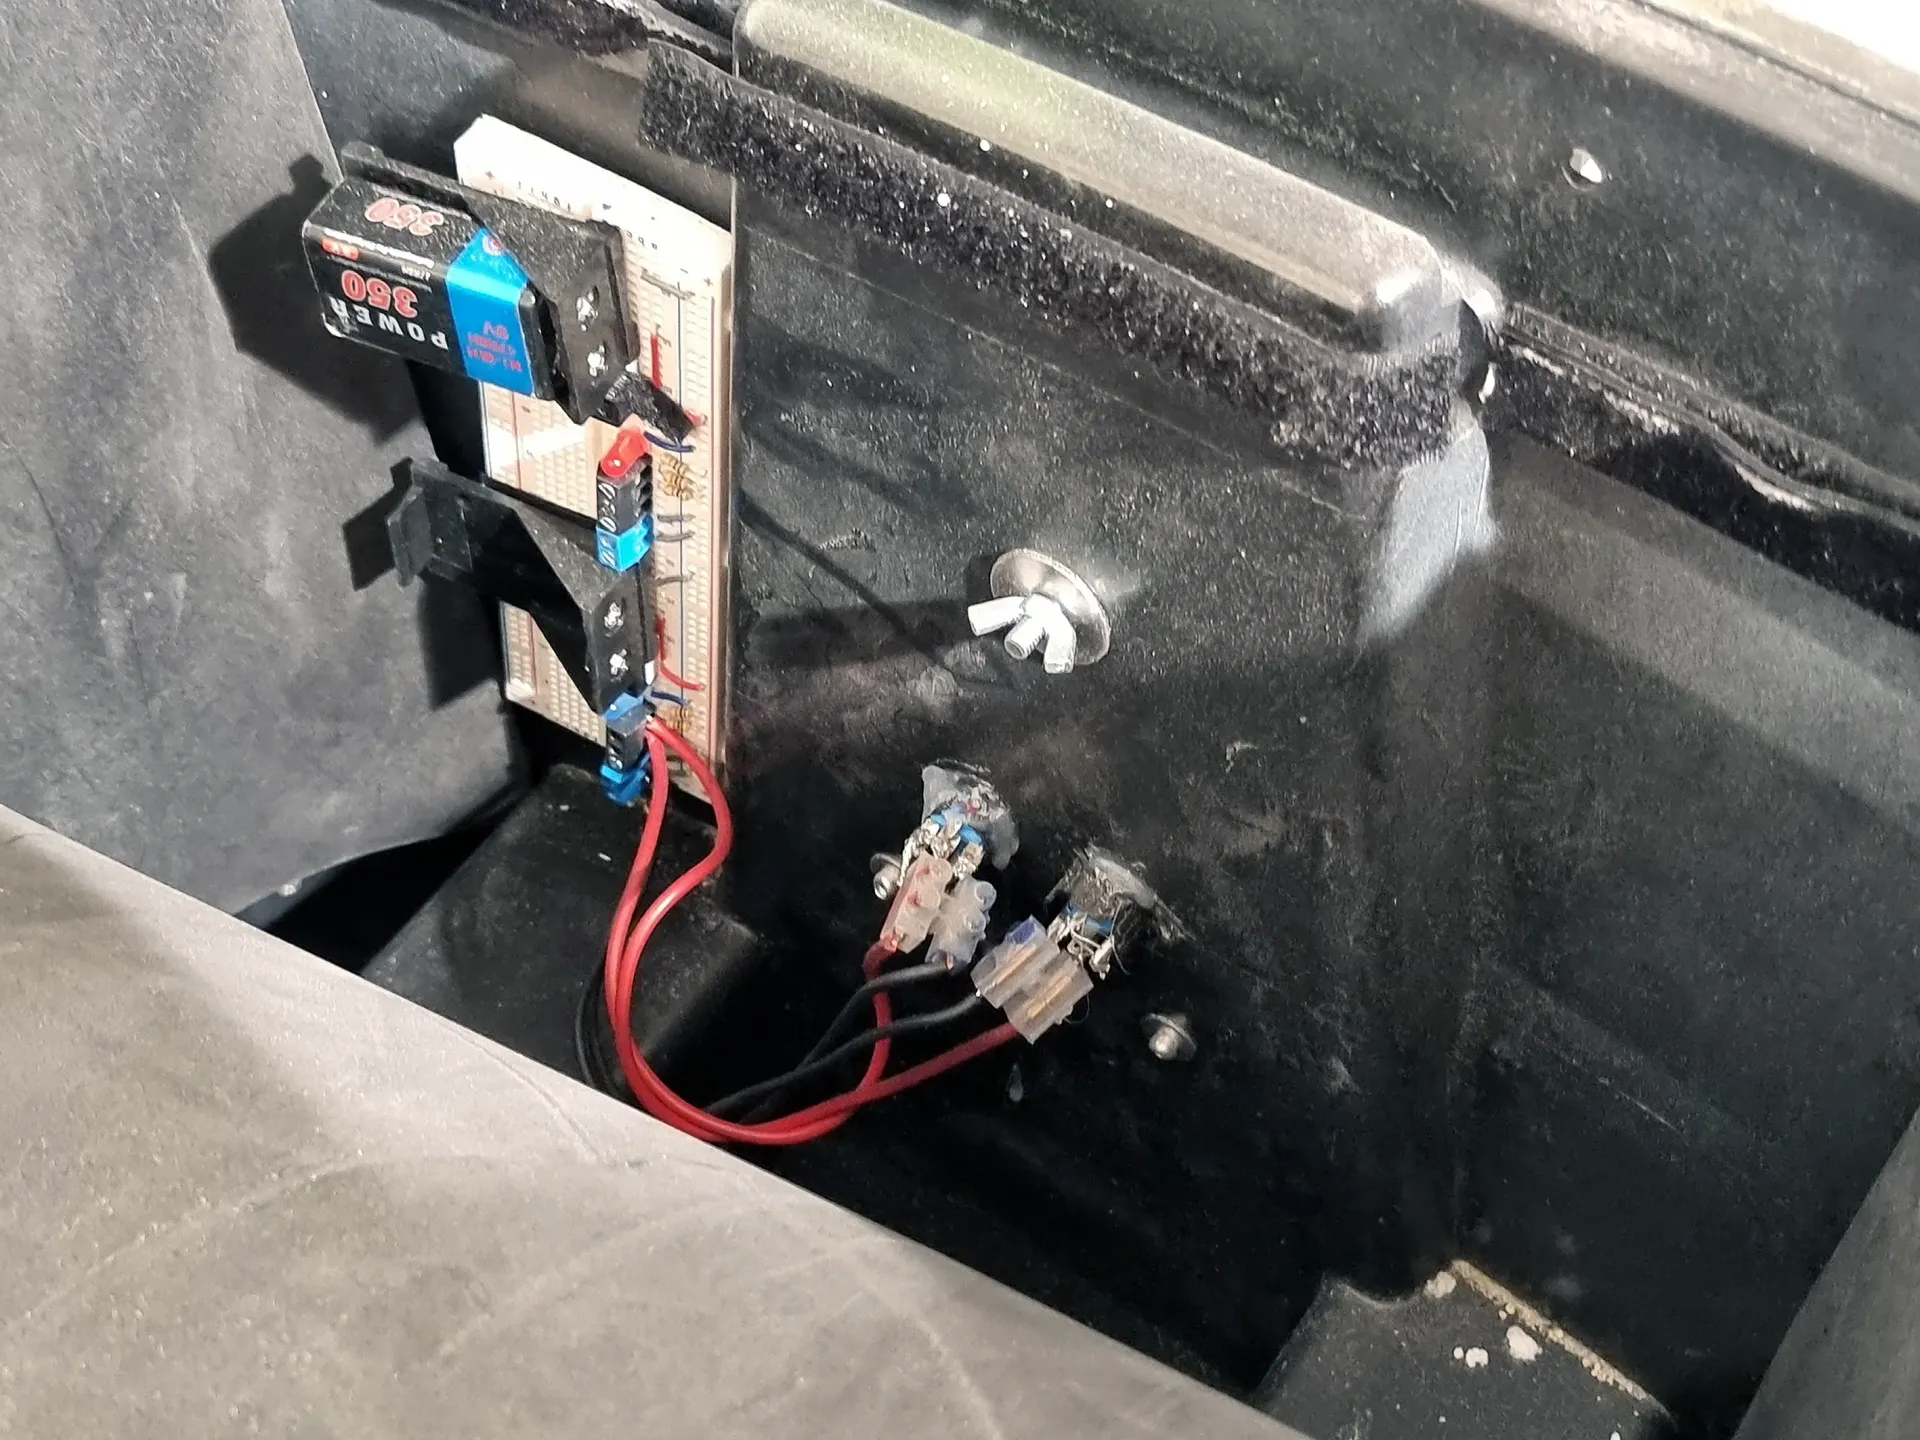
My chosen 5th attempts dropped soldering altogether to switch to bread broads.
These push in boards are far easier to attach components as they are just push in and alterations of fitting does not cause damage to the board or components and is a simple case of pull out and put back in.
The drawback is the parts could fall out but are held fairly firmly.
The circuit can be tested before trimming the pins for a firmer fit to prevent catching components from their underside.
I also altered the circuit to double up every thing so lots of redundancy.
This included backup
- Batteries
- Switches
- Connecting Points
- Armed LEDS
- Wiring Paths Connection on the Buttons and connecting wiring.
Depending on the bread board and if the positive and ground rails run all the way down of half way.
If all the way the 2nd battery could power everything.
If its half way you still get a complete backup set.
In the photos one set of wires goes to the buttons but the cable connectors have spare slots so the breadboard can send a complete 2nd set of red and black connecting cables.
In addtion, one breadboard could power the button pairs at both end of the cases, and with a breadboard at either end then this would be the best reducdancy options.
The breadboards came with sticky pads.


Electroluminescent String
Electroluminescent string was to add what appeared to be high tech features.
These were self-contained in the 2 AA battery box with buttons which turned the system on and off and cycled through stay on slow and fast flash modes.
The only things that needed to be done here was to feed the electroluminescent string through unused rivet holes drilled earlier, then for me to stick velco with sticky backs to attach the control battery packs to the inner case walls.
I got these in a 10 pack.
The only problem with these was the short lenght and more so the dim lighting ability meaning to really be seen there needs to be a degree of darkness.


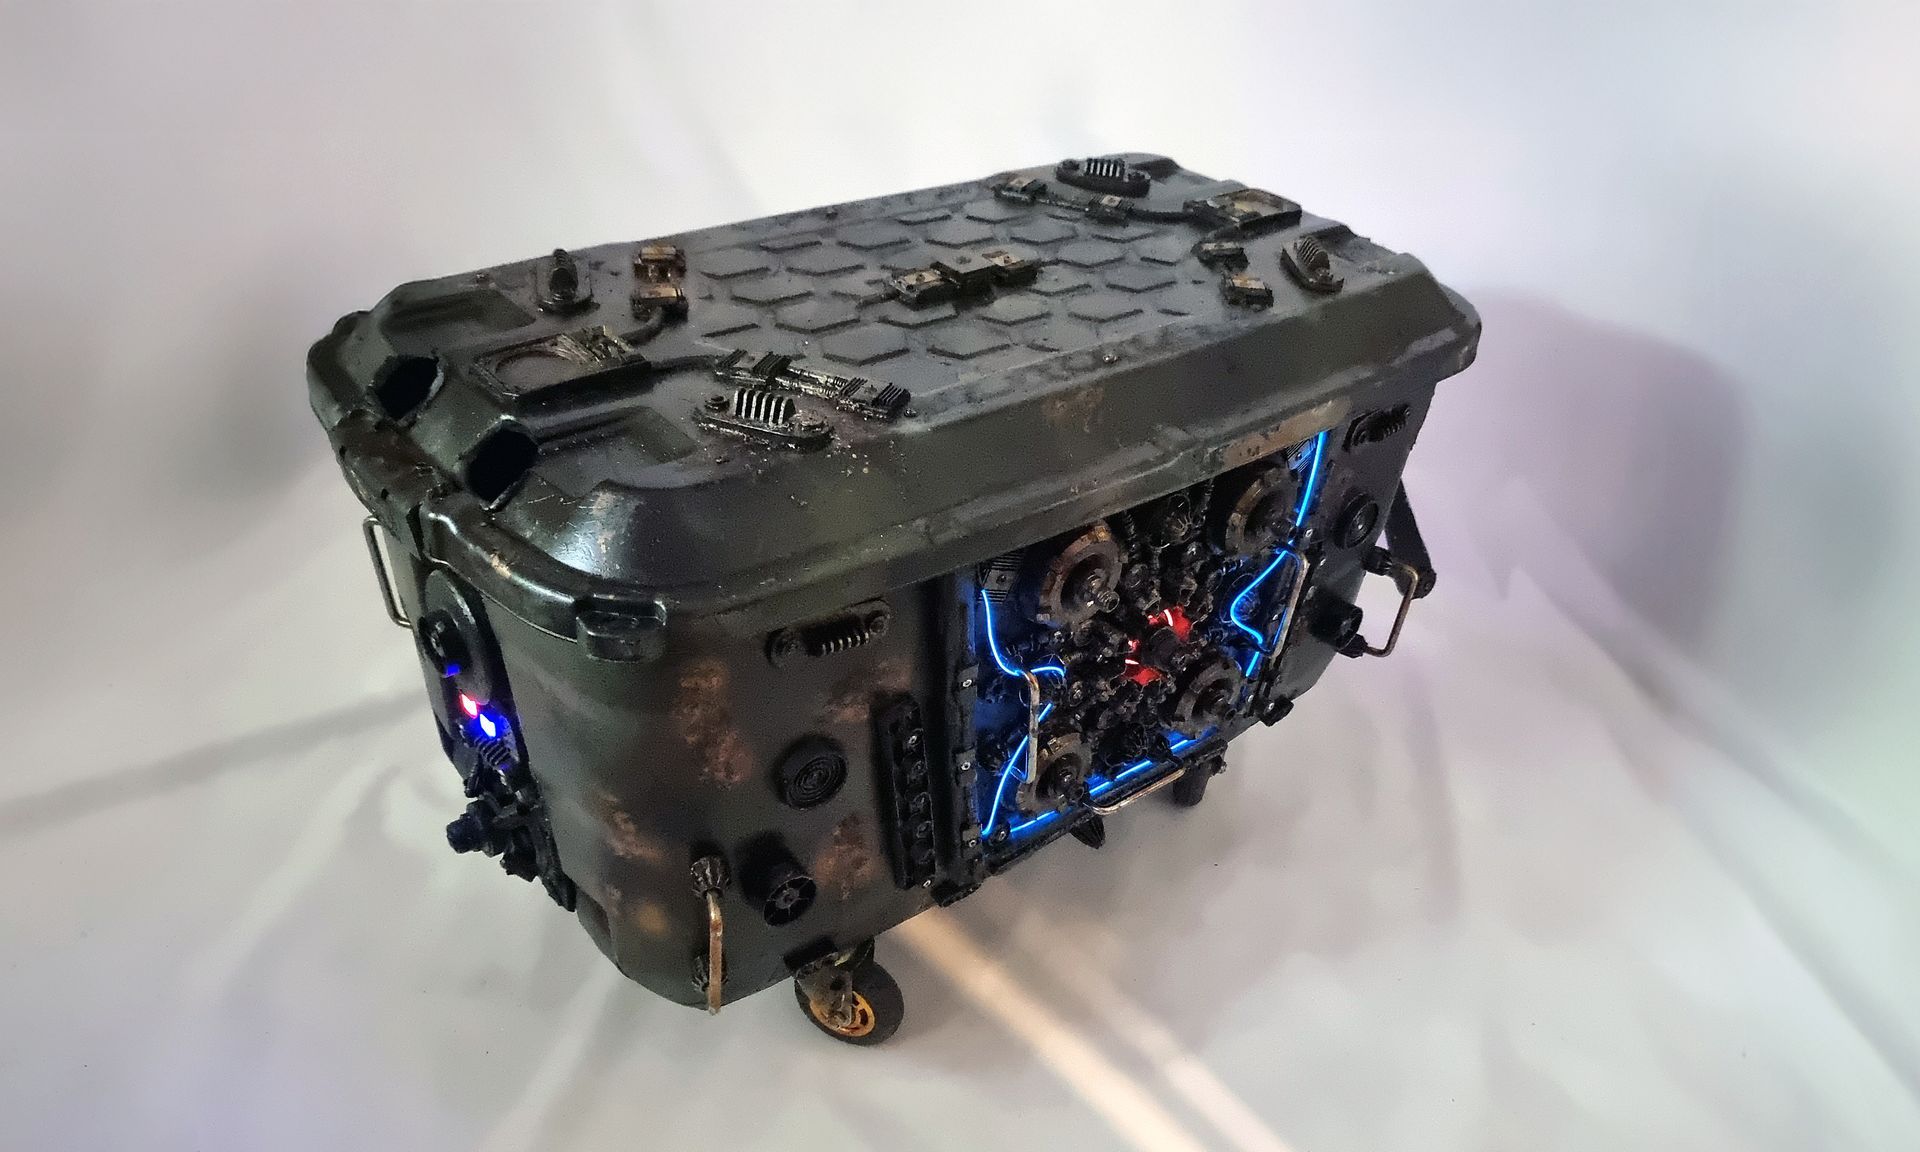
Finished Result


Future Plans
Future plans could include adding RGB strip lighting with sold ribbons, possibly under the top rim plus adding lighting to the lid.
This could include electroluminescent panel such as these components with possible circular indents as well as more buttons.


