
Star Wars Base Hacker
Transport Case - Problem Solving - Communication Tower Slots


Communication Tower Slots Issues


Issues
The ideal would be for a trunk that was long enough to put the tower prop in whole and fold flat.
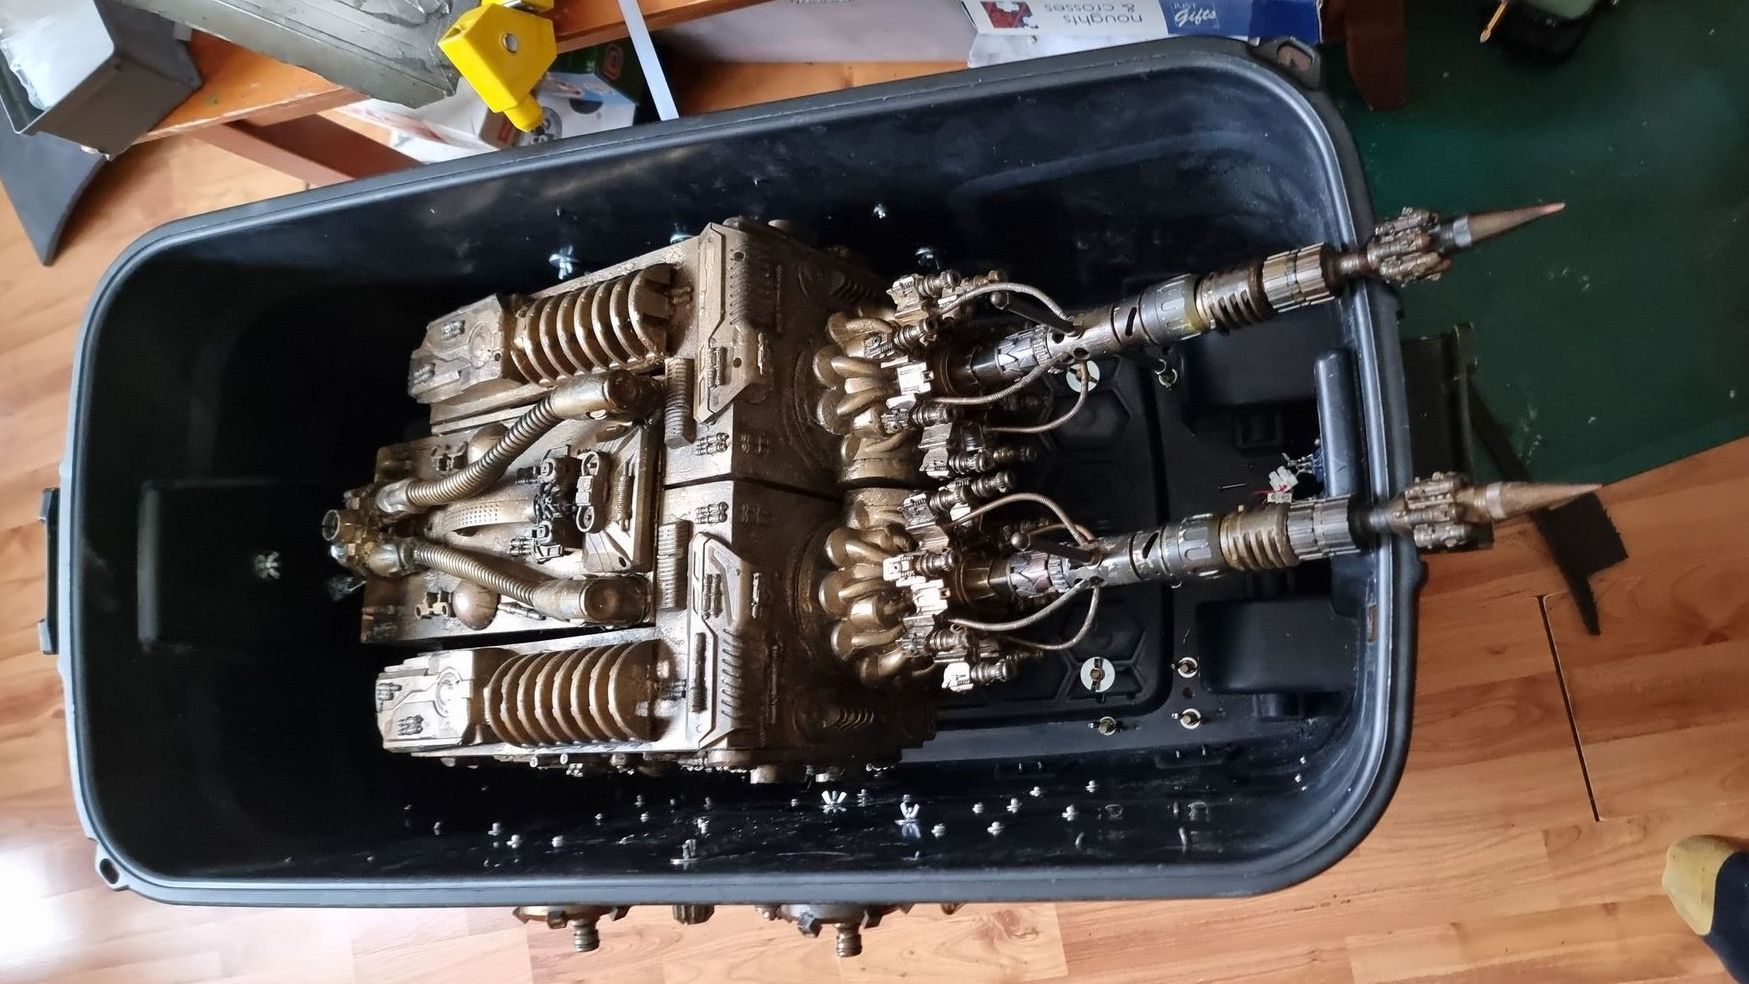
The main problem is the communication towers which double the length of the prop. Too long for the trunk and I could not find any others that fitted.
Possible Solutions:
Detachable Communication Aerials Unscrewed
The next Idea was removable communication towers.
This was impossible with the original design of the prop as the towers were made from components glued together in layers but was no better than a tower of Lego with no structure, just one brick on top of another and just fell apart. They were so weak they would fall apart when the prop was simply opened.
My upgraded towers where totally reconstructed with a 12mm steel thread shaft running the length of the towers which were screwed into the end of the prop wings through the Dyson motors into the box ends.
It also harmed my hands as the screw threads cut into them till, I added the cross-bar handles.
They were intended to be removable, however screwing down 22 cm into Dyson motor housing is a chore and takes time and could risk damage.
This was intended to take to interviews or film job fairs and taking a good 10 minutes to screw in and out is not practical or impressive.
As MythBusters would say its plausible but not practical
With hindsight a bayonet like fitting similar to what would be on a sniper’s briefcase rifle would be a far better solution but I could not see how to retrofit such a system.
I was also concerned about the torque damaging the aerials or the prop base.


Possible Solutions and Problems
Holes and Slots
A better idea was to add holes and slots for the ends of the towers due to the aerials being too long. This is the starting point. The case littered with rivets and screw nuts. This needed lining to protect the prop
Holes in the Case Ends
Making holes in the ends of the case to place the prop horizontally in side is all the kit bashing mechanics areas there would be ruined as the holes would go right through the middle of it.
The holes would need to be lot bigger to factor in the angle the prop would need to be inserted at before levelling out.
There would be a high risk of damage to the communication towers when inserting or withdrawing the prop when they catch on the holes and the leverage for the heavy prop.
This is more so as the positions of the holes would stay static if in the walls of the case.
Slots in the Case Ends
Making slots from the top opening of the case down to the when the communication towers rest when the prop is placed in the case level.
This would be worse as more of the ends would be destroyed to accommodate the slots.
In addition the case would lose structural integrity.
Placing the Tower Vertically
There was not the room to do this
Slots in the Lid
Placing the prop at an angle.
This would be better than in the case as the case would hold structural integrity. The lid would lose some strength, but far less critically than the main case.
These were all rejected.


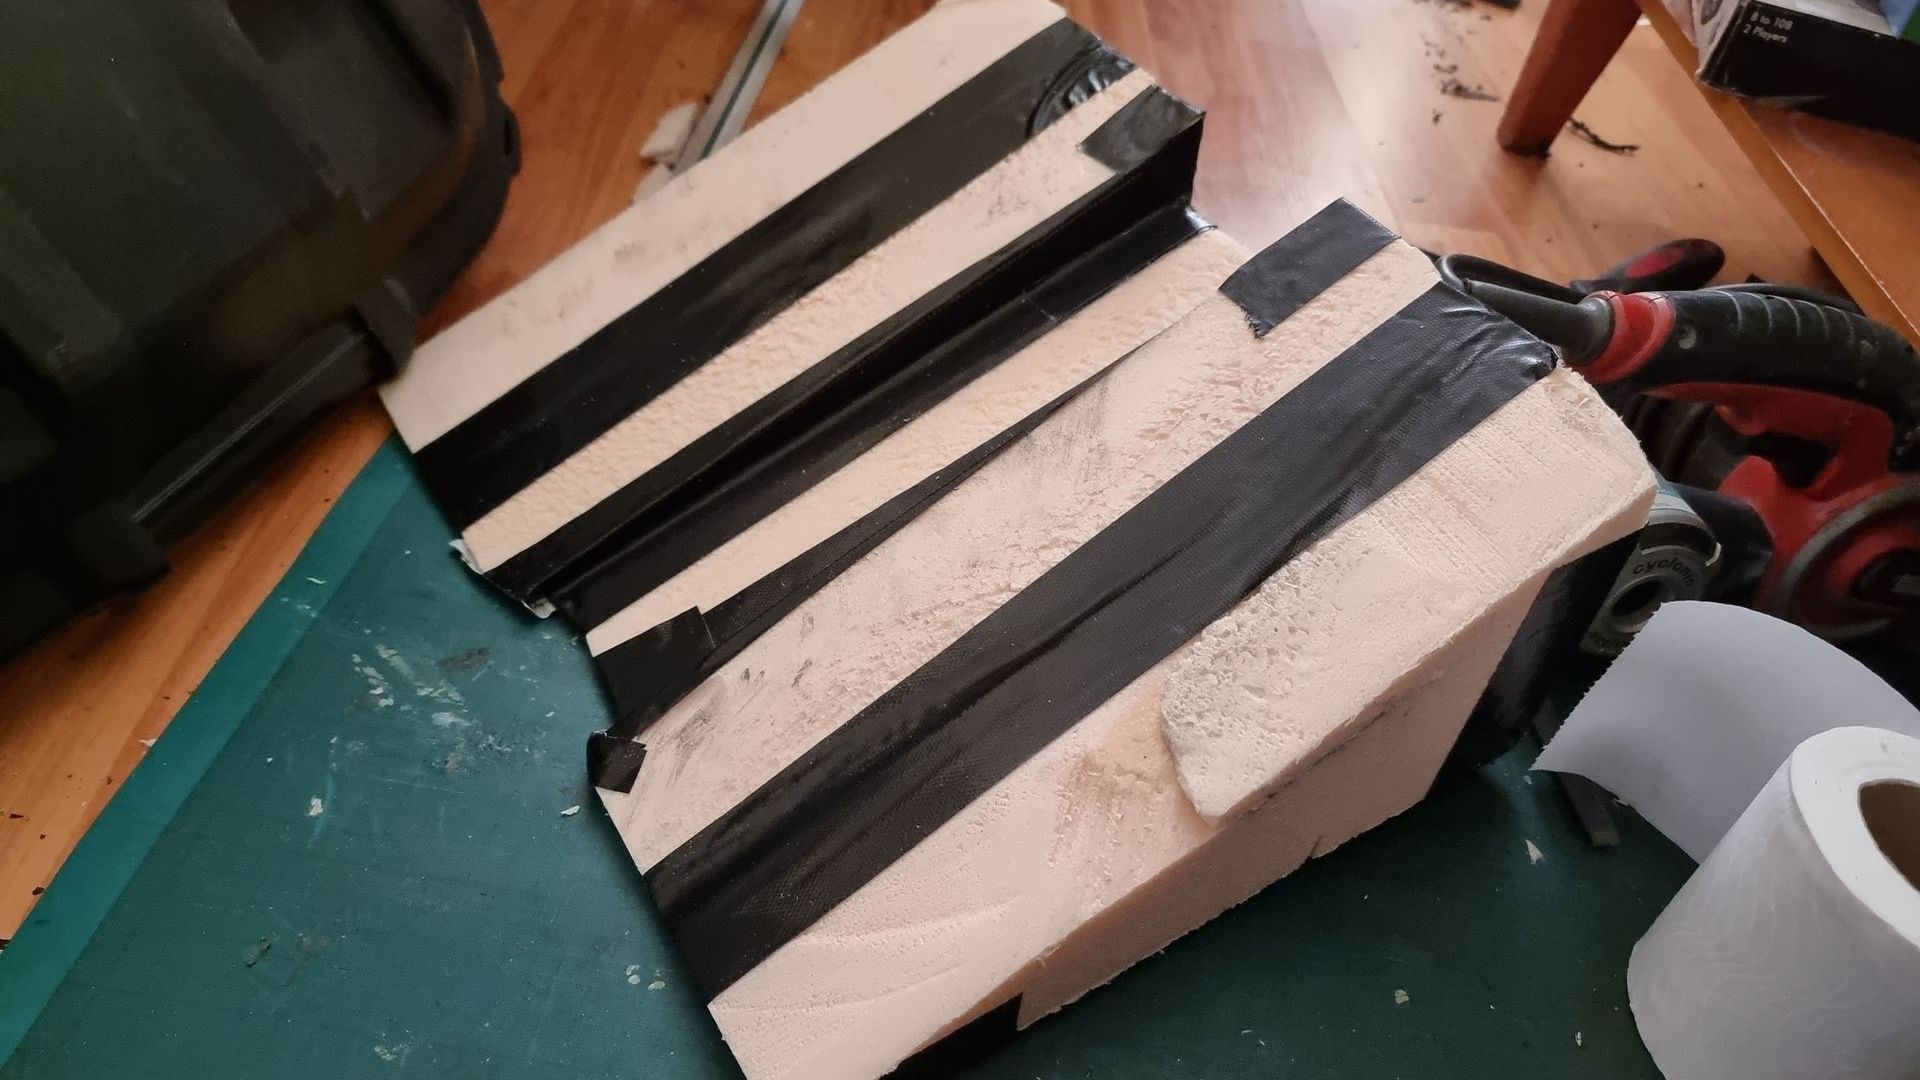
Chosen Solution : Ramp with Padded Holes in Lid
The solution I came up with was to make a ramp that supported the prop so the ariels where not taking the weight of the prop causing sheer forces on the ariels and stress points in their base on the props, or at least minimising them so the ramp supports the weight or at least supports nearly all of it.
This will be angled so the aerials rest just above lip edge of the open prop.
Slot holes can then be added to the lid.
The holes can be made big enough to allow for a wide degree of movement flexibility, so the aerials are less likely to get caught on the edges of the holes and the lid can be manoeuvred around them.
As the holes will be much larger than the ariels, they need lining to softly close the holes around the ariels and line the edges so less likely to scrape the ariels or catch and rip off kit bash components off them, especially as the components on the end of the ariels are only glued on and cannot be riveted as the core components are solid metal.
Building the Ramps
I made the ramps out of low density Sikablock Modelling block foam, glued and duct taped them together. The ramp was then coated in thin Plastazote foam. Under the ramps will be a layer of Plastazote foam Velcroed in place. Under the ramps will be a layer of Plastazote foam Velcroed in place.


Carving the Holes
The holes were drilled with milling drill bits and my Finn Multitool which gave fine control and enabled me to give the holes rounded inner corners to prevent stress points and catch points.
I experimented to try and work out the best size and shaped holes that gave a fair amount of leeway.


Lining the holes
I then lined the holes with 1cm circular profile extruded Plastazote foam and cut up a under door brush draft excluder strip.
This was glued and riveted to the insides of the holes.
The hair allows the aerials to pass through the holes and keeps them away from the sides as well as sealing them. The cylindrical foam lining backs this up.
It’s mainly the draft extruder strip material doing the job of keeping the aerial kit bash components safe.
It also makes the holes soft so there is some give and less leverage so less pressure on the aerials and less stress due to the prop resting at the wrong angle.


